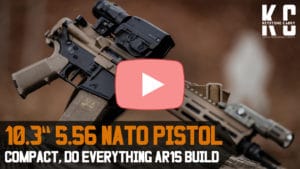
10.3″ AR15/5.56 NATO Pistol Build
- December 9, 2020
- By Jared Daub
My 10.3″ AR15 Build: A Compact, Do anything pistol build.
We as humans create out of necessity. Sure, sometimes it is simply out of curiosity or passion that we create, usually there is a purpose. The purpose of this build for me was simple: I wanted a short 5.56 NATO platform that could do everything I asked it to do at closer distances, run reliably, shoot suppressed well, and be compact enough to fit into one of my backpacks. This build does all of the above and more.
My goal for this blog is to simply give you all a roadmap for the components and the “why” behind the build. I will also provide links as best as possible to the components I have used in this build. Before we dive too far into that, I have to let you all know that some of the components were sent to me (Jared/KeystoneCarry) for review on my page @keystonecarry. For a full list of disclosures please see the YouTube video linked at the bottom of this blog post.

For many years I’ve received questions about short AR15 platforms. Folks often have asked me if I think a super short 556 platform was a good option. Up until recently I would almost exclusively recommend 300 blackout if someone is looking at building an AR15 that is shorter than an 11.5 or 12.5 inch barrel. Why is this you might ask? This is simply due to ballistics. When you get to super short 556 platforms the velocity drastically drops. We’re talking that in a 10.3″ barrel 556 vs a 10.3″ 300 blackout shootout the velocities will be VERY close. Add on top of that the fact that the 300 blackout will be launching a bullet at least twice as heavy as the 556 at those velocities and you’ll quickly see why the 300 blackout has a slight edge. For this reason I have typically replied with a suggestion to consider a 300 blackout build.
About a year ago I got my hands on a Geissele 10.3″ Upper receiver and that changed everything for me. I still don’t particularly like the velocity drop in a super short 556 platform, but this particular build has made me into a believer. Before I dive into the benefits of this particular build, I’d like to consider the shortcomings of a possible 10.3-10.5″ build like this:
- Velocity drop in 5.56 NATO. Short barrel = substantial velocity drop
- Accuracy reduction? This is somewhat dependent on the build quality and components but generally speaking my super short 5.56 platforms do not perform as well as my longer barreled builds in the accuracy department
- Gas pressures. Many short 5.56 Platforms suffer from excess gas. I solved this with superlative arm’s piston conversion kit. More on that later
- Smaller rail space, less room for attachments. This is not unique to a 5.56 but it is something to consider.
Of those negatives listed, the velocity has always been, by far, the biggest turnoff of a short 5.56 NATO platform in my mind. I’m ok with a short gun not being 1 MOA. I’m OK with a big more gas pressure, rail space isn’t really an issue for me. With the negatives on the table, let’s discuss the positives that led me to building this particular 5.56 platform:
- Compact size = ultimate in maneuverability.
- Ammo availability. It’s no secret we are in an ammunition crisis. Shooting 300 Blackout right now is not really financially viable. 5.56 is also expensive, 300 blackout right now is outrageous.
- Portability and ability to be concealed in a bag.
- Enough velocity to still be capable even out to 200 yards. Primary distances for this gun are 100 yards and closer for my purposes.
Having the upper receiver on hand is really what spurred on this build. Without that, I probably wouldn’t have built this pistol. Man would I have missed out if that had happened. Initially I simply slapped the upper on a milspec lower with a milspec sto….I mean brace, ran a milpsec trigger and called it good. I wasn’t very happy with it the more I shot it and it ultimately sent me on a journey to try to perfect this build and make it a smooth running, smooth cycling short 5.56 NATO AR15 build. I’m very happy to say that I nailed this build. It is extremely efficient, accurate, comfortable, fun to shoot.
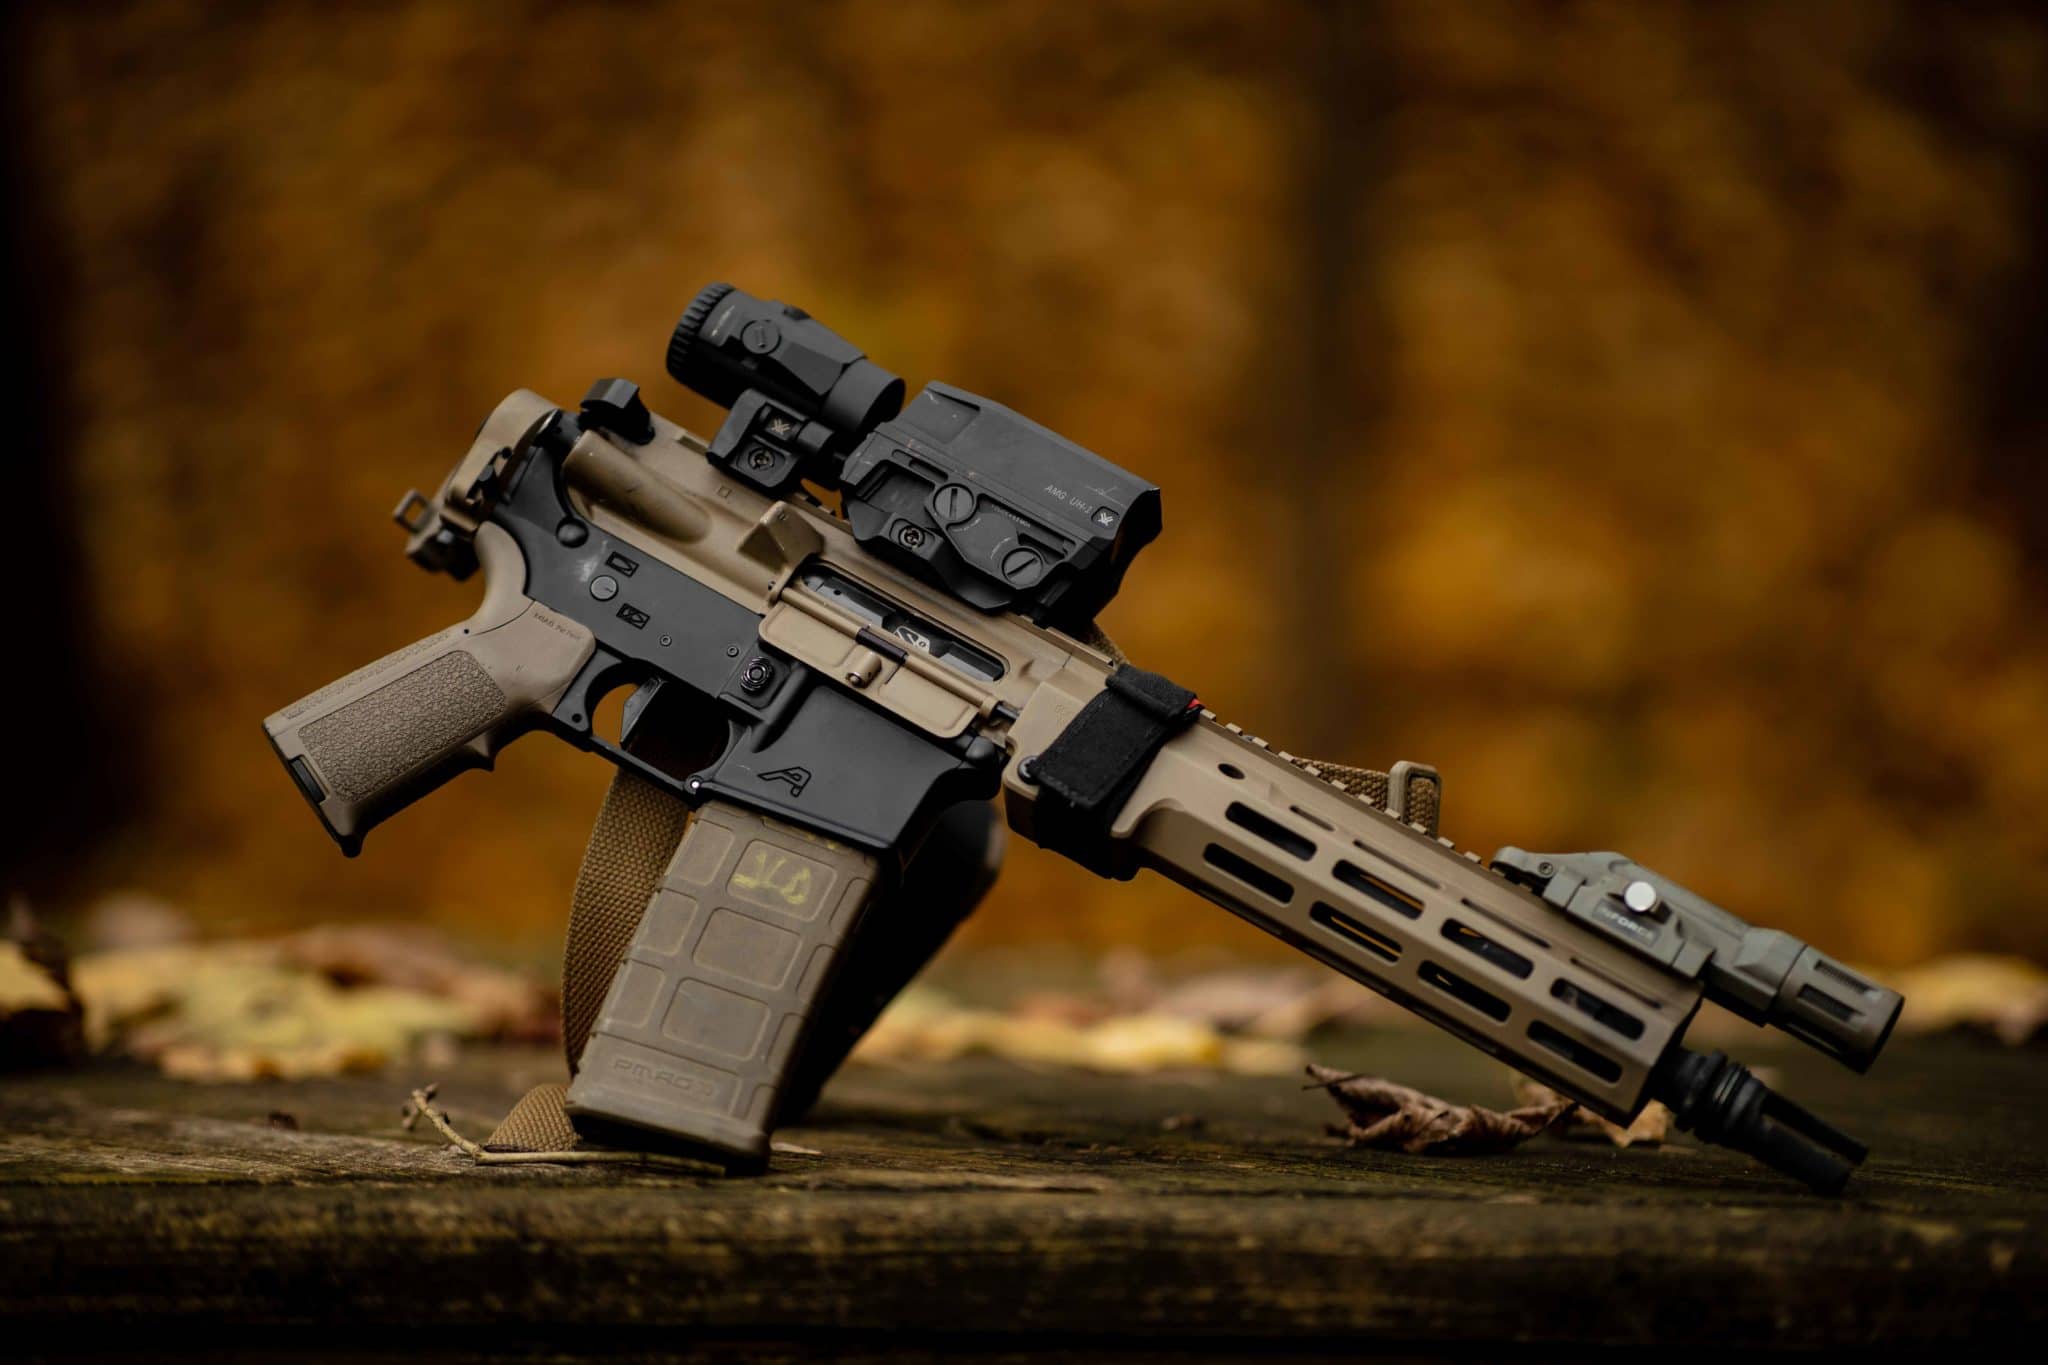
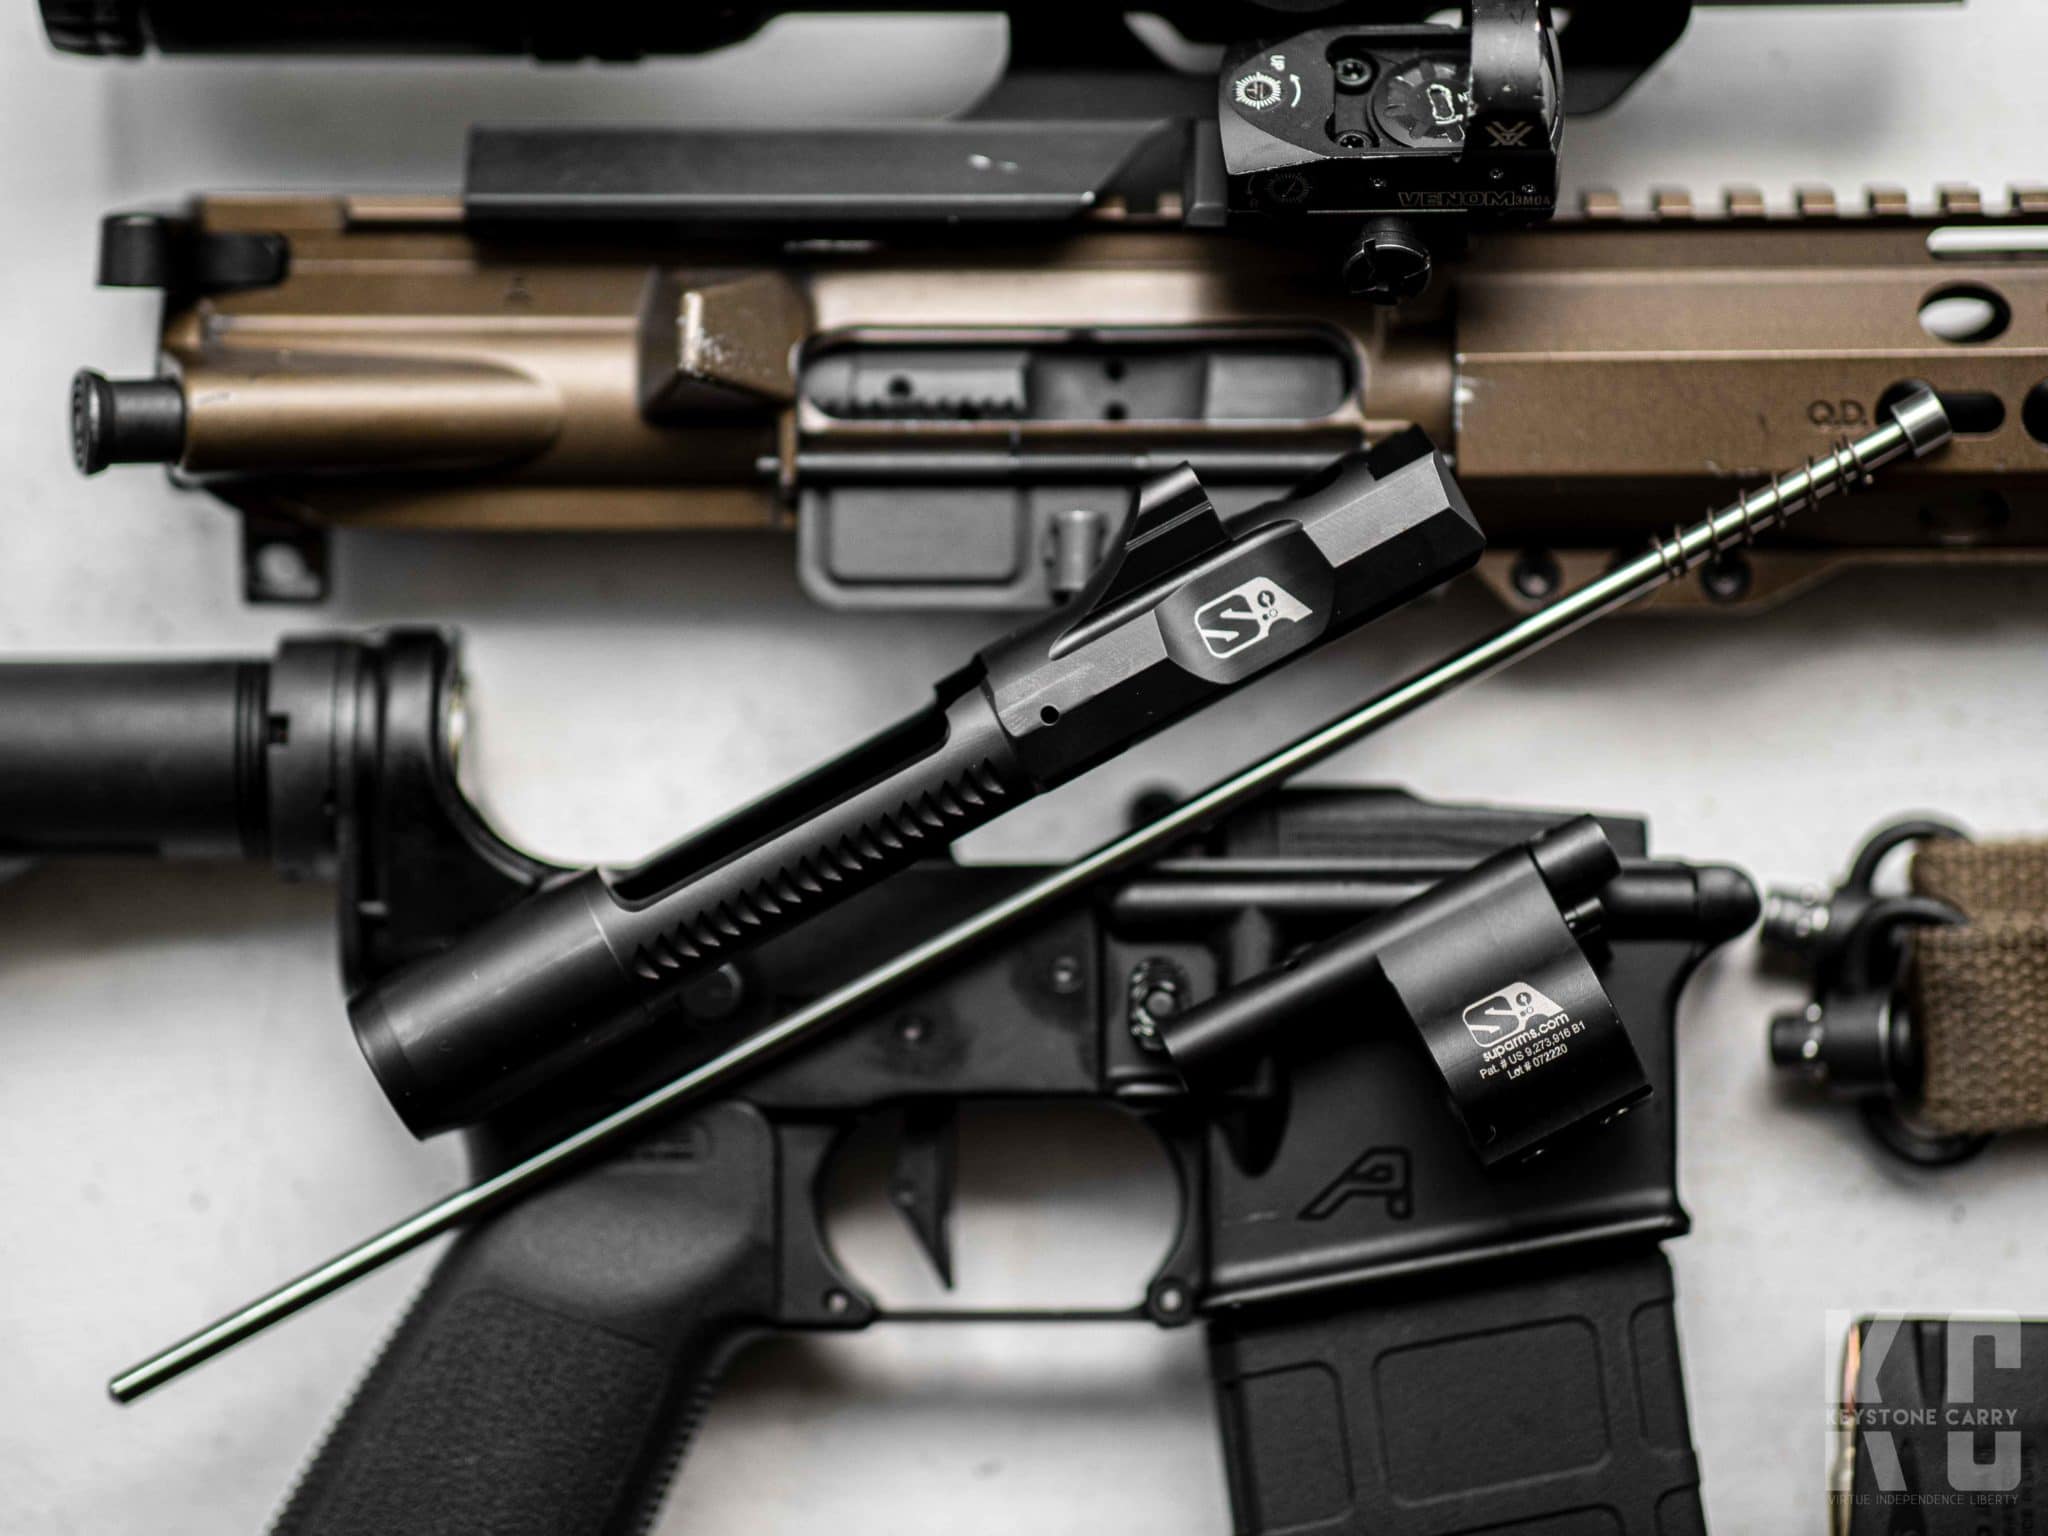
Starting on the upper receiver it is a Geissele 10.3″ upper receiver with the MLOK rail. The Geissele rail locks solid into the upper receiver and the barrel nut attachment for the rail is legit. I do not currently own a rail that locks in as good as this Geissele Rail. The 10.3″ Upper receiver came factory with a carbine length gas system. This is pretty typical for a shorter 5.56 NATO build. Some longer barreled AR15 pistols (Like IWI’s Z15) come with a mid length gas system. I found that initially the Geissele ran well, but it had more gas than was necessary. It was a bit violent to shoot compared to my dialed in AR15’s. That’s not to say that it was bad, it ran great. I’m sure it would have run like that for eternity. I just simply wanted to dial it in more. Enter the Superlative Arms piston kit.
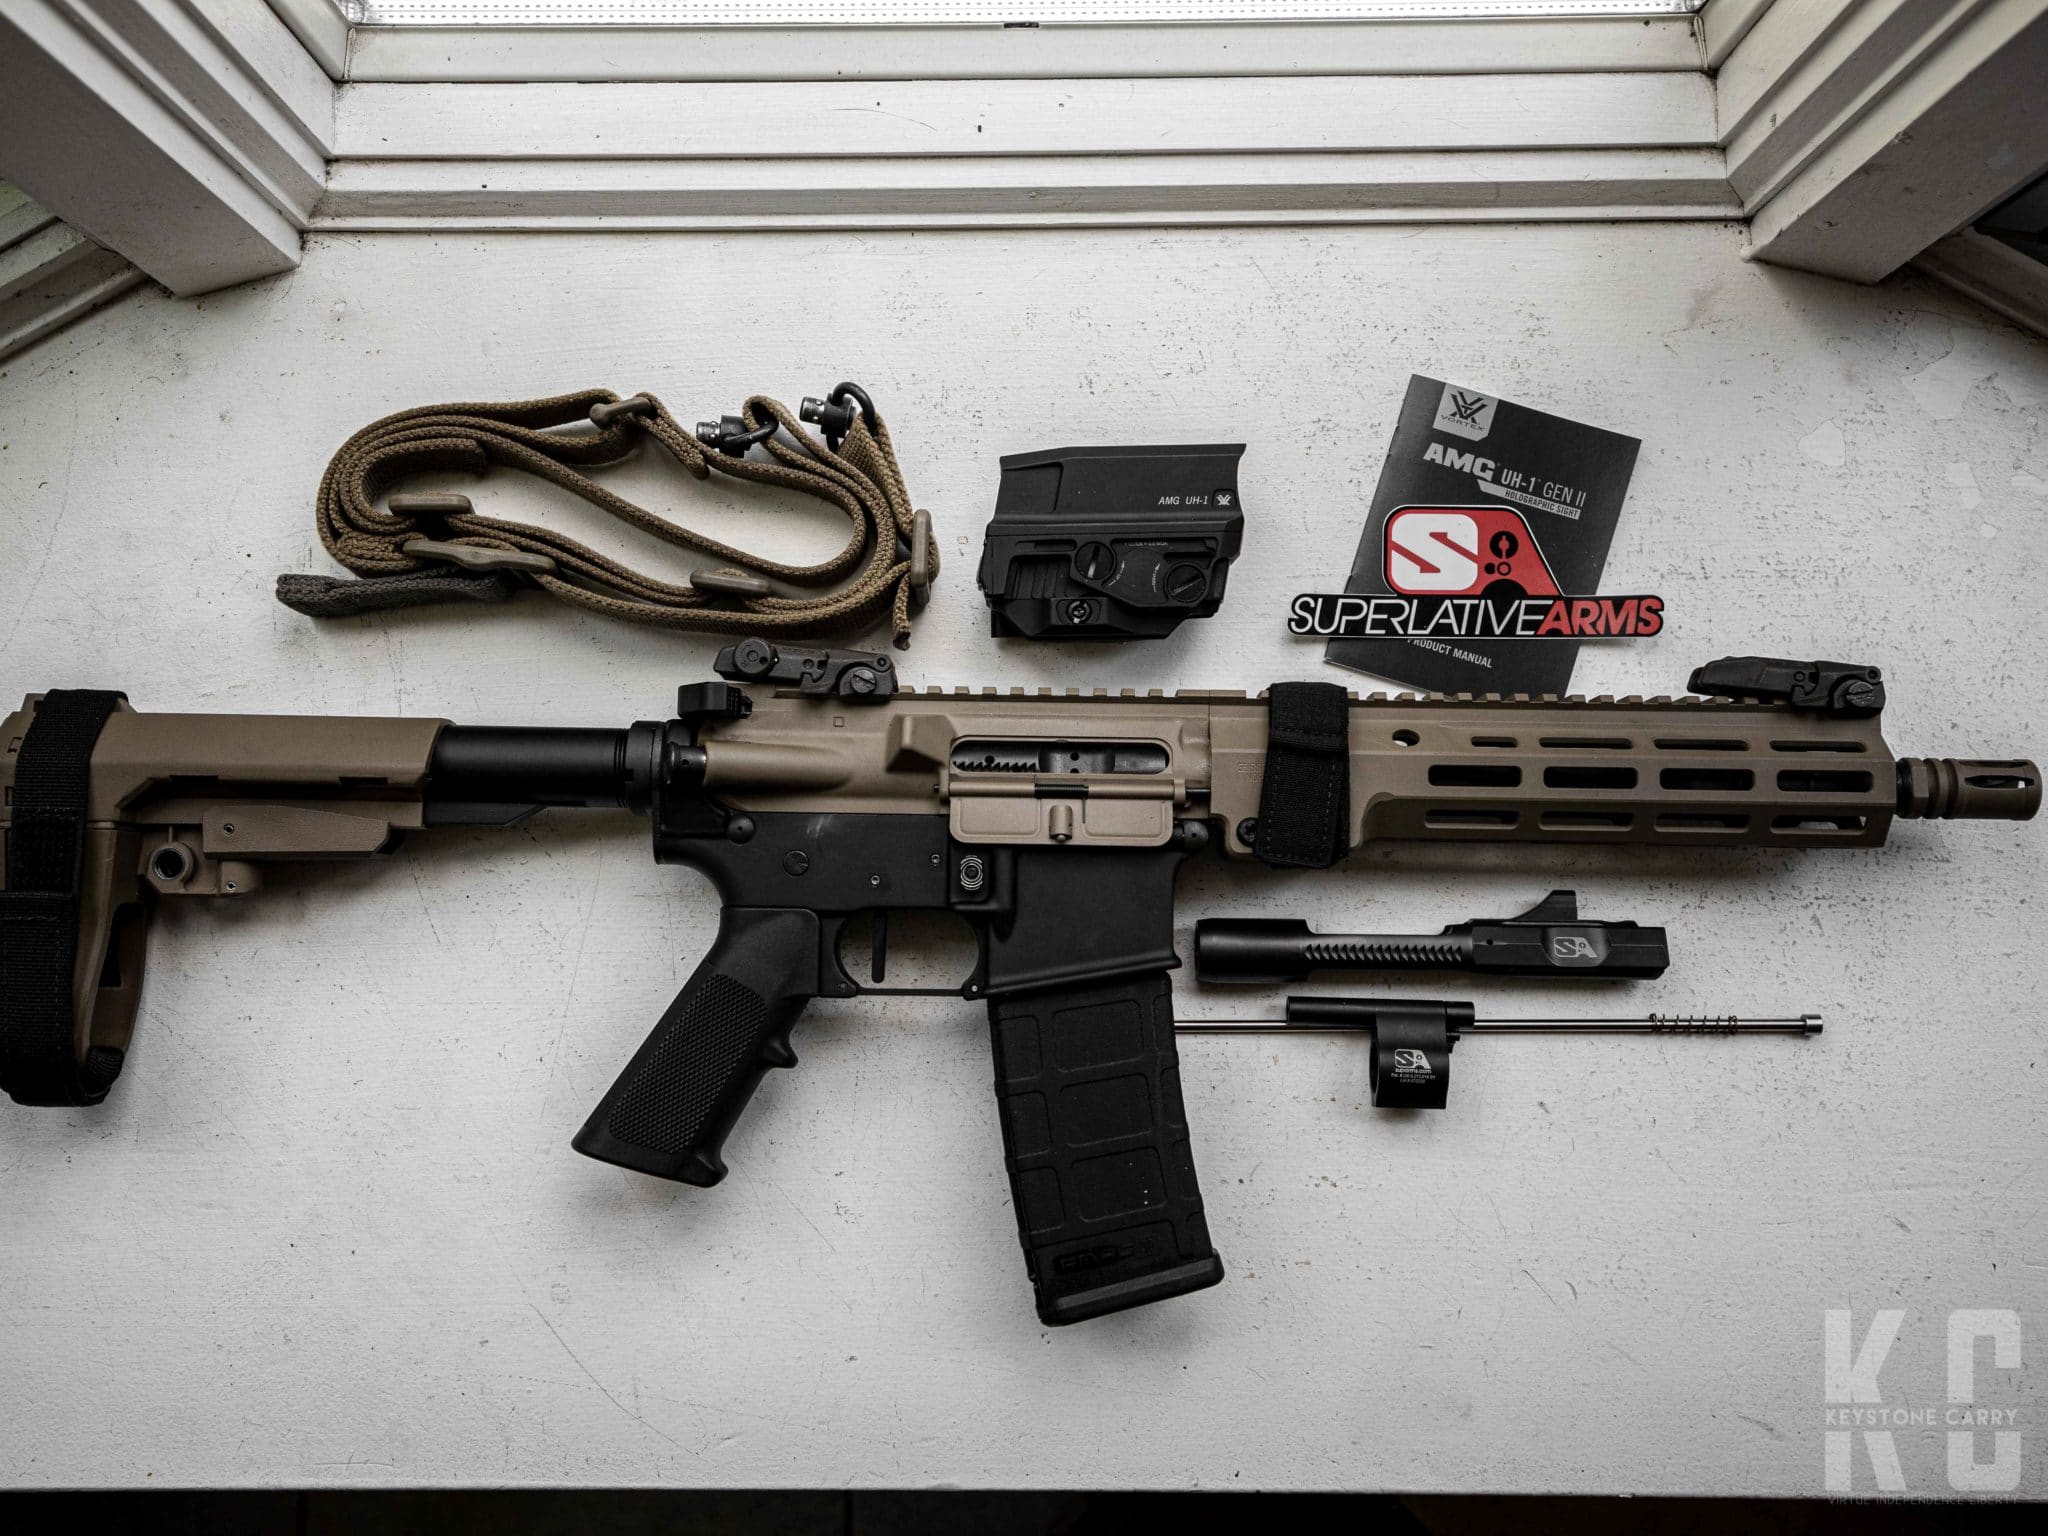
The Superlative Arms Carbine Length Piston Kit is a truly exceptional piece of this build. The BCG features their special ultra slick finish that easily wipes off even after thousands of rounds. The kit includes the piston, a tool to install a bushing into your upper receiver and the piston block. I ended up needing to add a dimple to my barrel for the piston block set screws. The geissele dimples did not quite line up perfectly. I did this with my dremel and a bunch of setup and measuring. After doing this I followed the instructions and installed the piston kit. One thing that is SUPER important to note: The first thing I will note about the Superlative Arms Piston kit is that you could run it two different ways. The first: Restriction mode. This simply covers a portion of the gas port in the barrel and restricts how much gas is allowed past. This is sort of like a traditional adjustable gas block, only there is a piston involved. However, if you keep turning the adjuster OUT, you’ll continue to overgass your gun by adding gas until you hit the sweet spot. Eventually you pass into the bypass section. There is essentially a second port that allows excess gas to vent forward. THIS is the way. You want to be in this range because it truly allows you to fine tune and dial in your gun. It took me an hour or two of messing around with settings to get it to exactly where I wanted. I opted for a setting that allowed the gun to run well without my suppressor, but also allowed it to run good suppressed. This means that it is a BIT overgassed suppressed, but not much. You can absolutely dial the piston kit in for your can, but I have my can off and on so much I needed to find a happy medium that worked across the board. I’m happy to say I found it. Along with that, less felt recoil, flatter shooting gun, cleaner upper receiver. Need I go on?


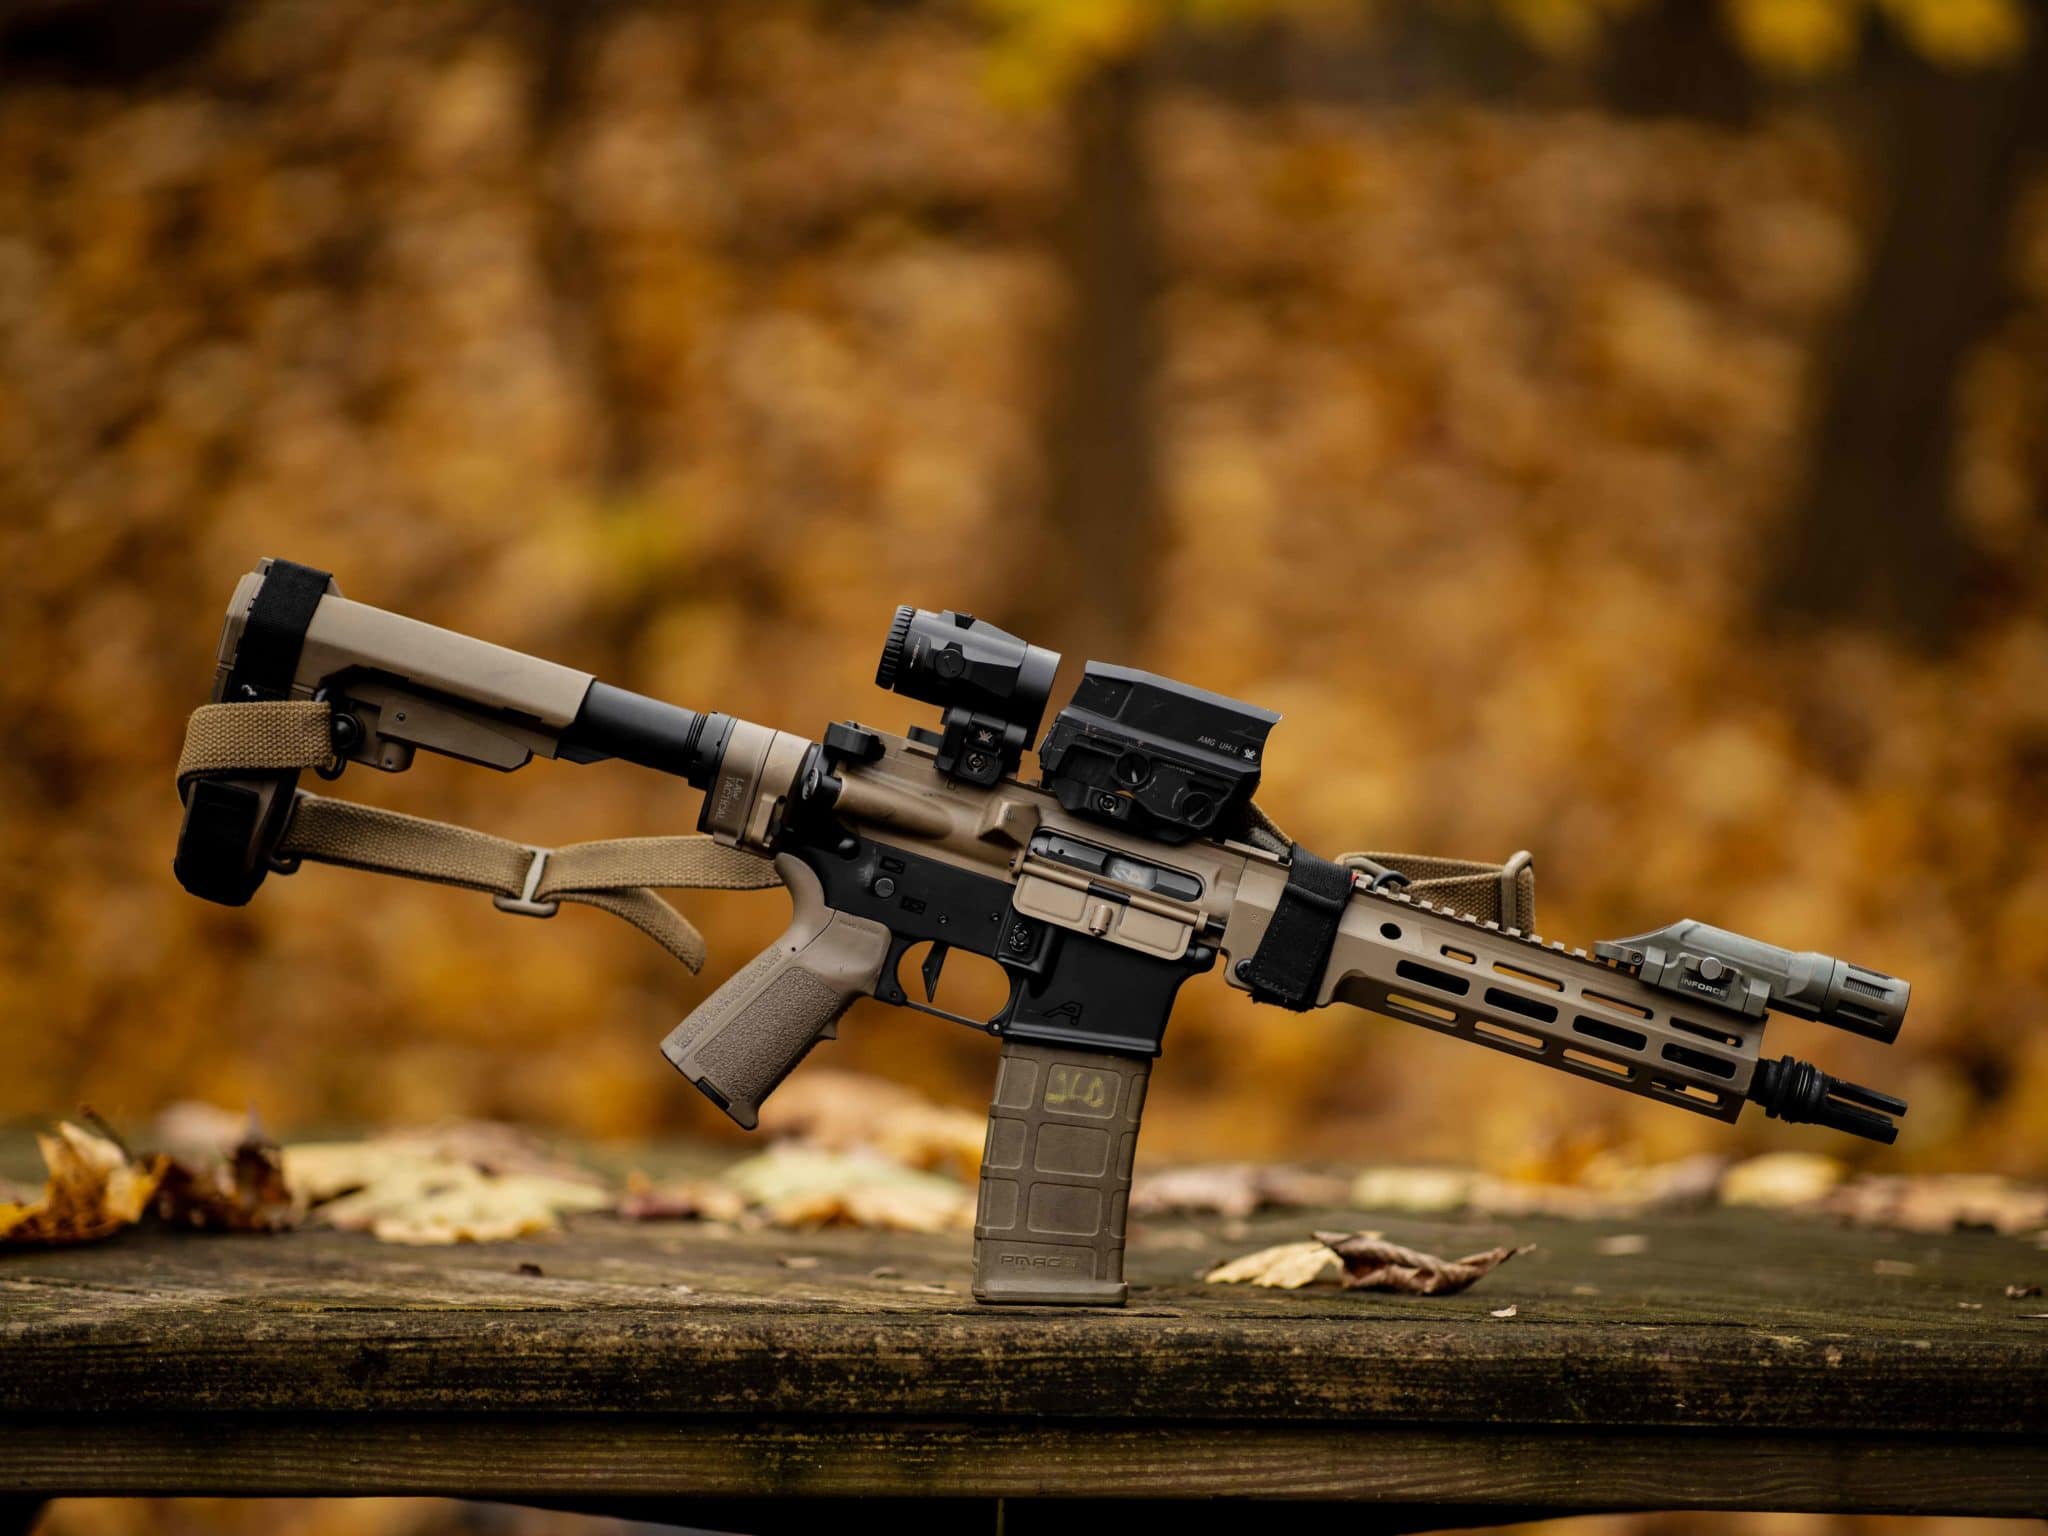
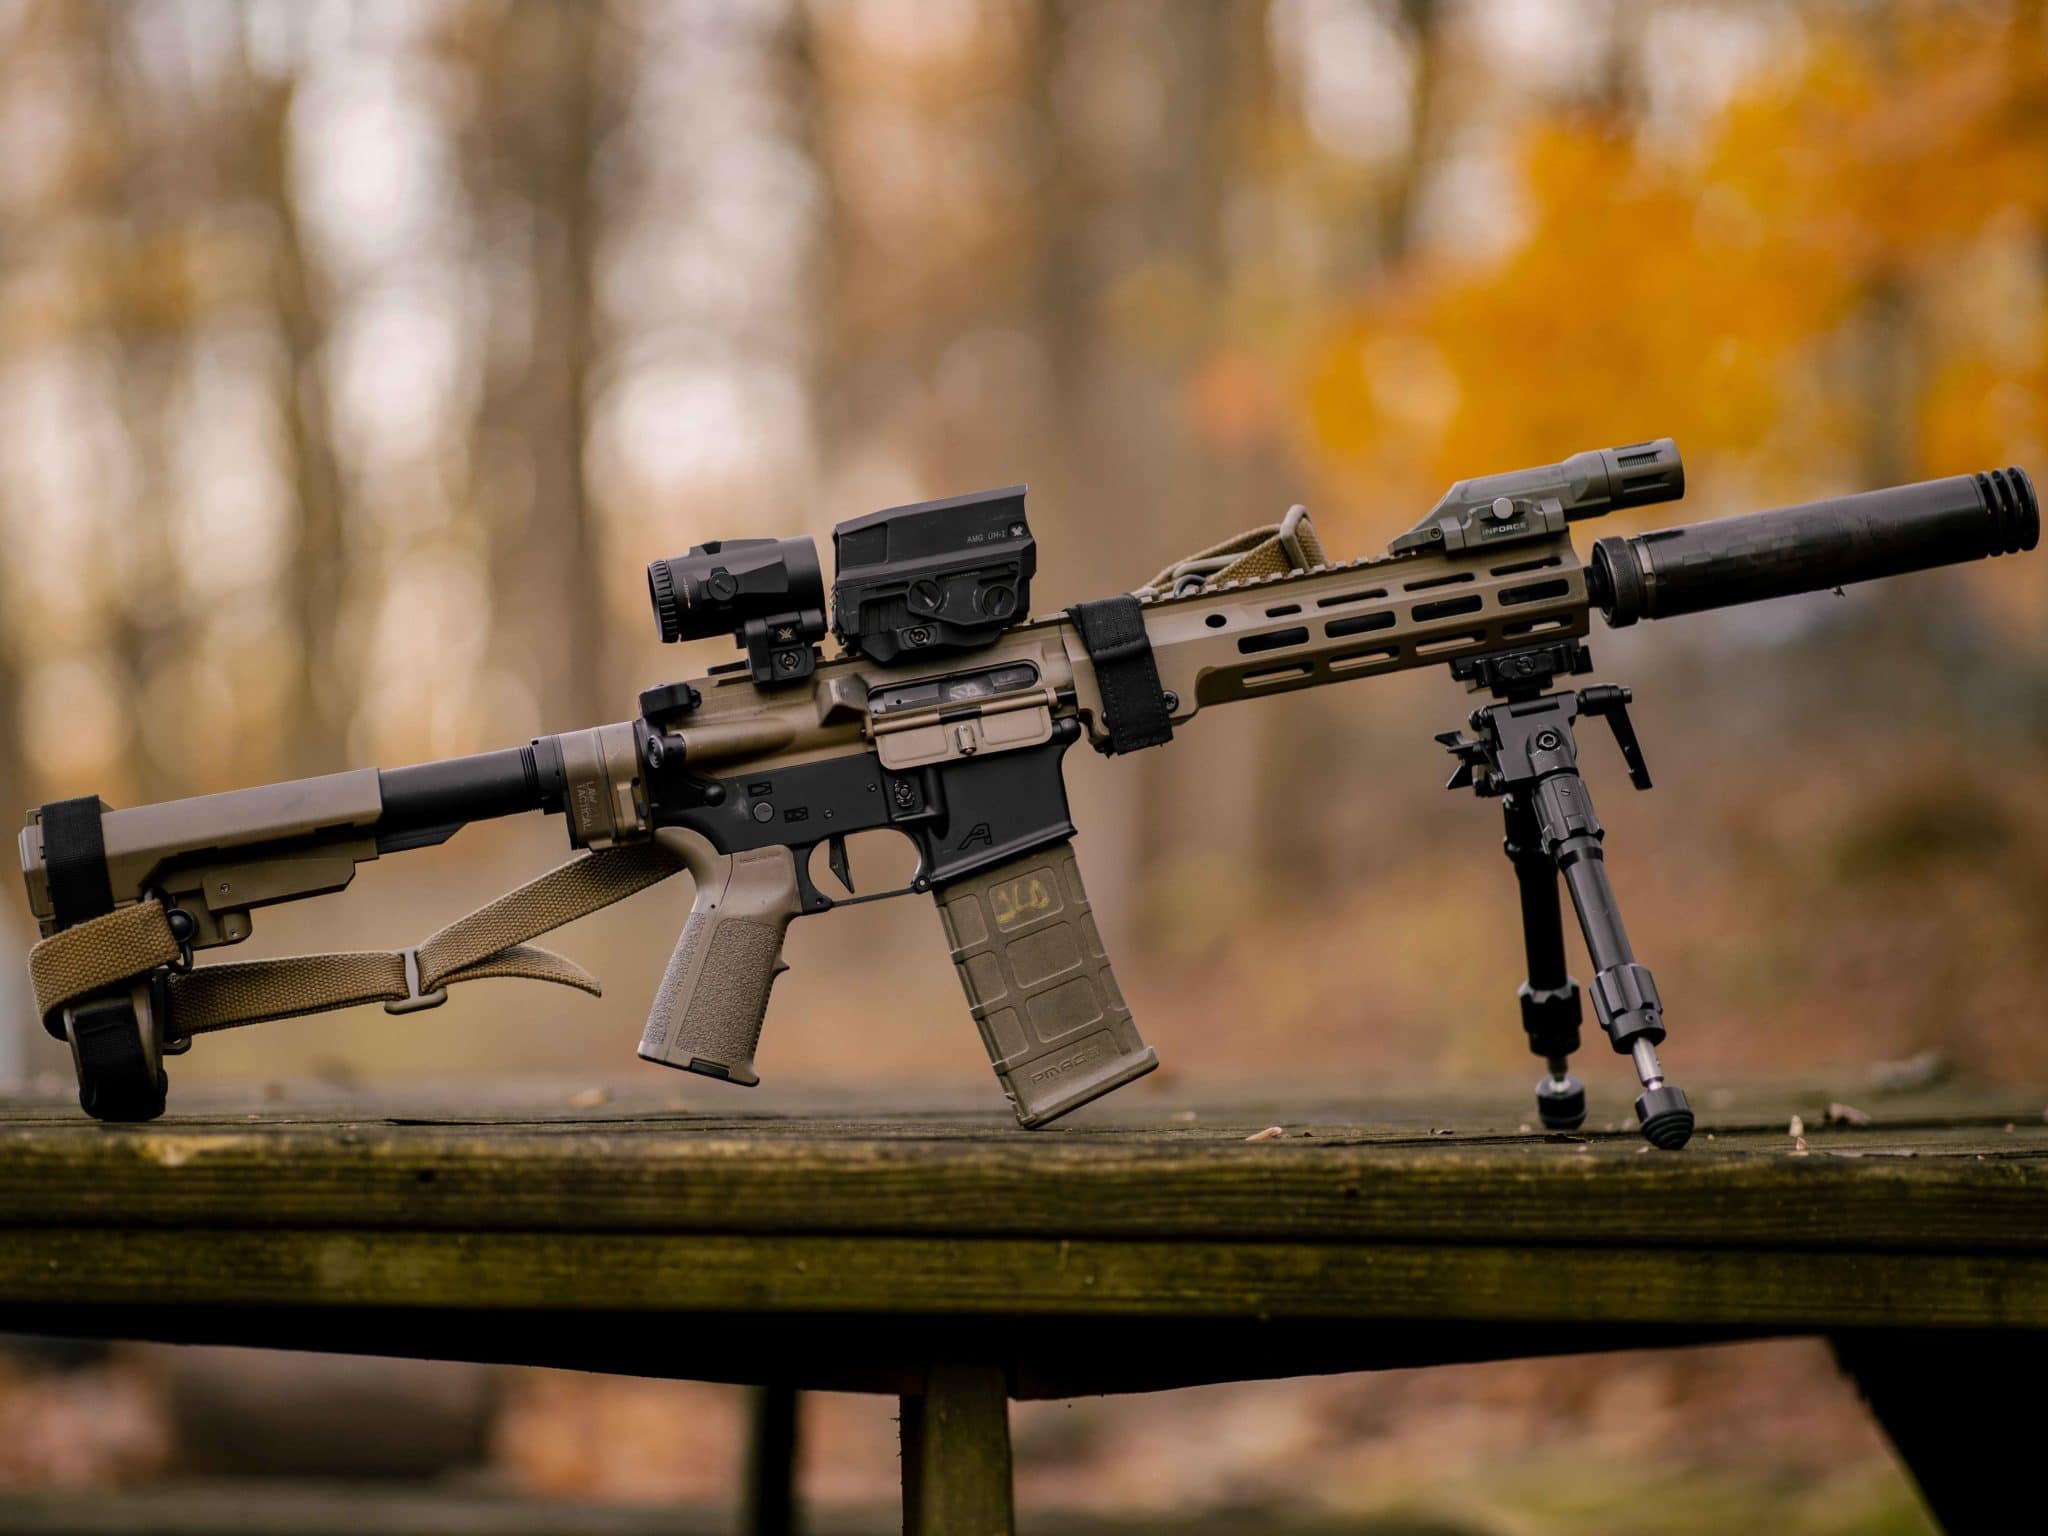
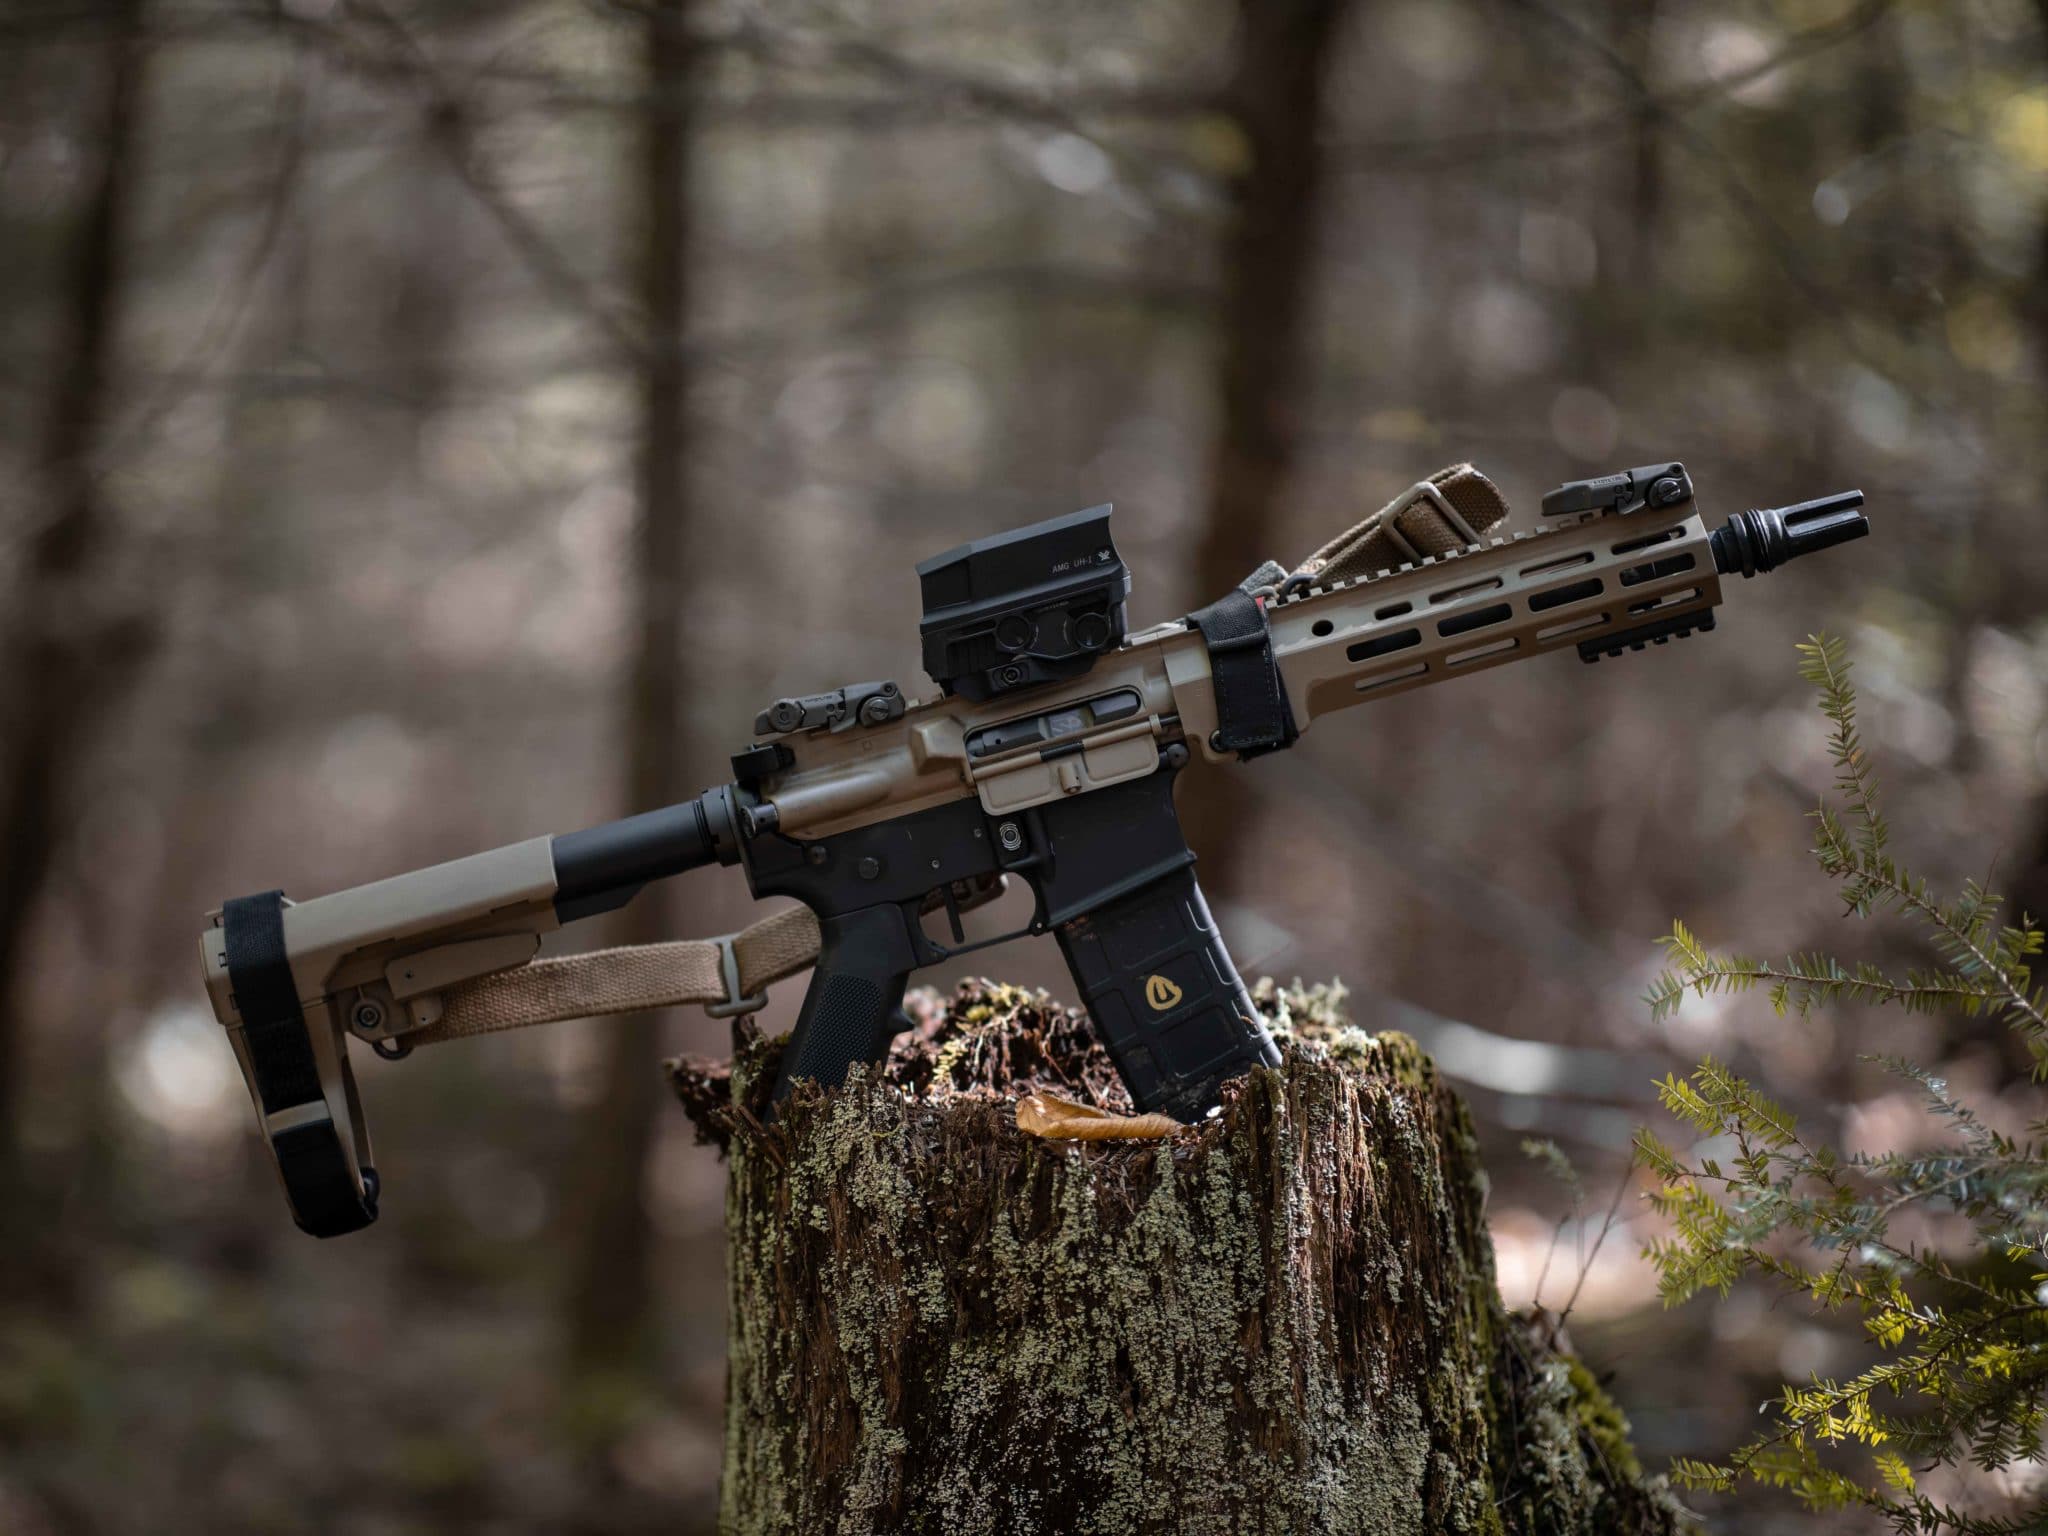
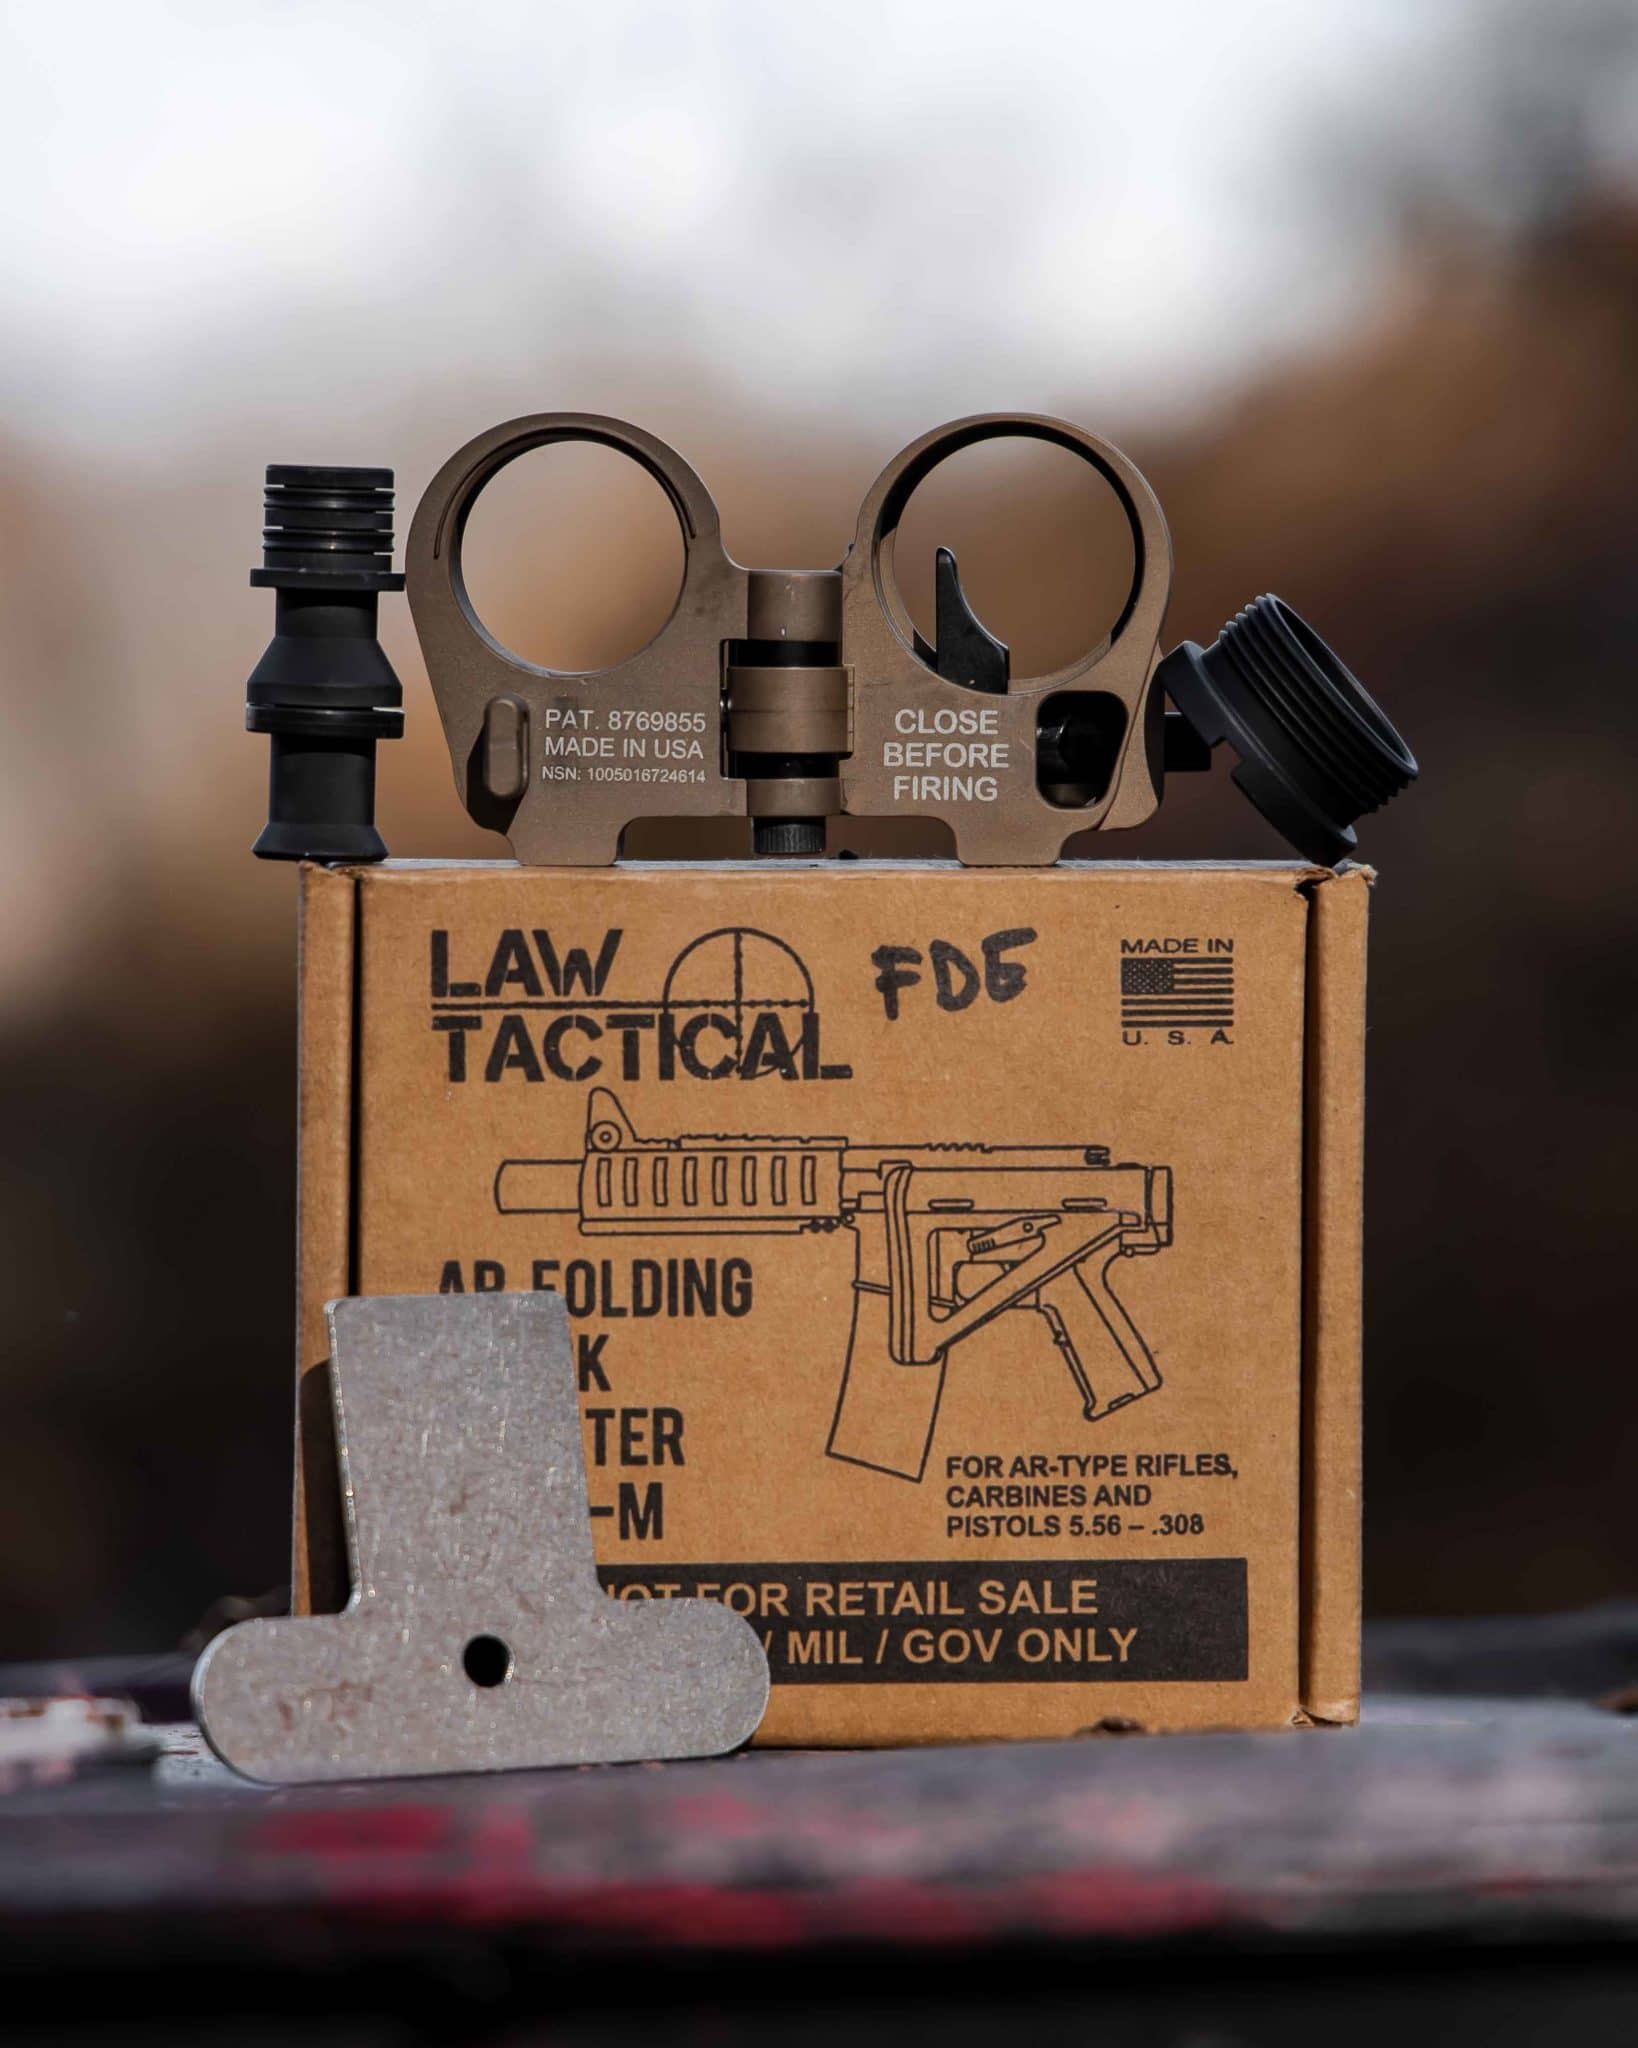
For the Muzzle device I defaulted on my favorite flash hider to date: The Silencerco ASR Flash Hider. I am running my super old Inforce WML on this build simply because I currently don’t own another weapon light. It’s not the brightest but it’s been through a lot and continues to work well. The lower receiver is an Aero precision standard lower receiver. It features a standard parts kit and a magpul grip. As far as the trigger is concerned, I opted to install the Geissele SD-E trigger. This trigger reminds me of a lighter SD-C (super dynamic combat) trigger. It is super clean with a very light break and clean reset. This is pretty much the perfect “do it all” two stage trigger that I’ve used. Amazing Trigger. LAW tactical jumped in and really helped me by connecting me directly to an FDE folding adapter for my SBA3 brace. The LAW folder is one of the only legitimate options for adding a folding function to a standard AR15 platform. Even if you don’t plan to carry in a backpack, I HIGHLY recommend this accessory for your builds. It makes any AR15 more compact even if it is just for storage and transport. The BCG extension also did not affect the cycling of the piston kit. I did spend another couple minutes fine tuning after adding the adapter but found plenty of adjustment to get this build dialed in perfectly.


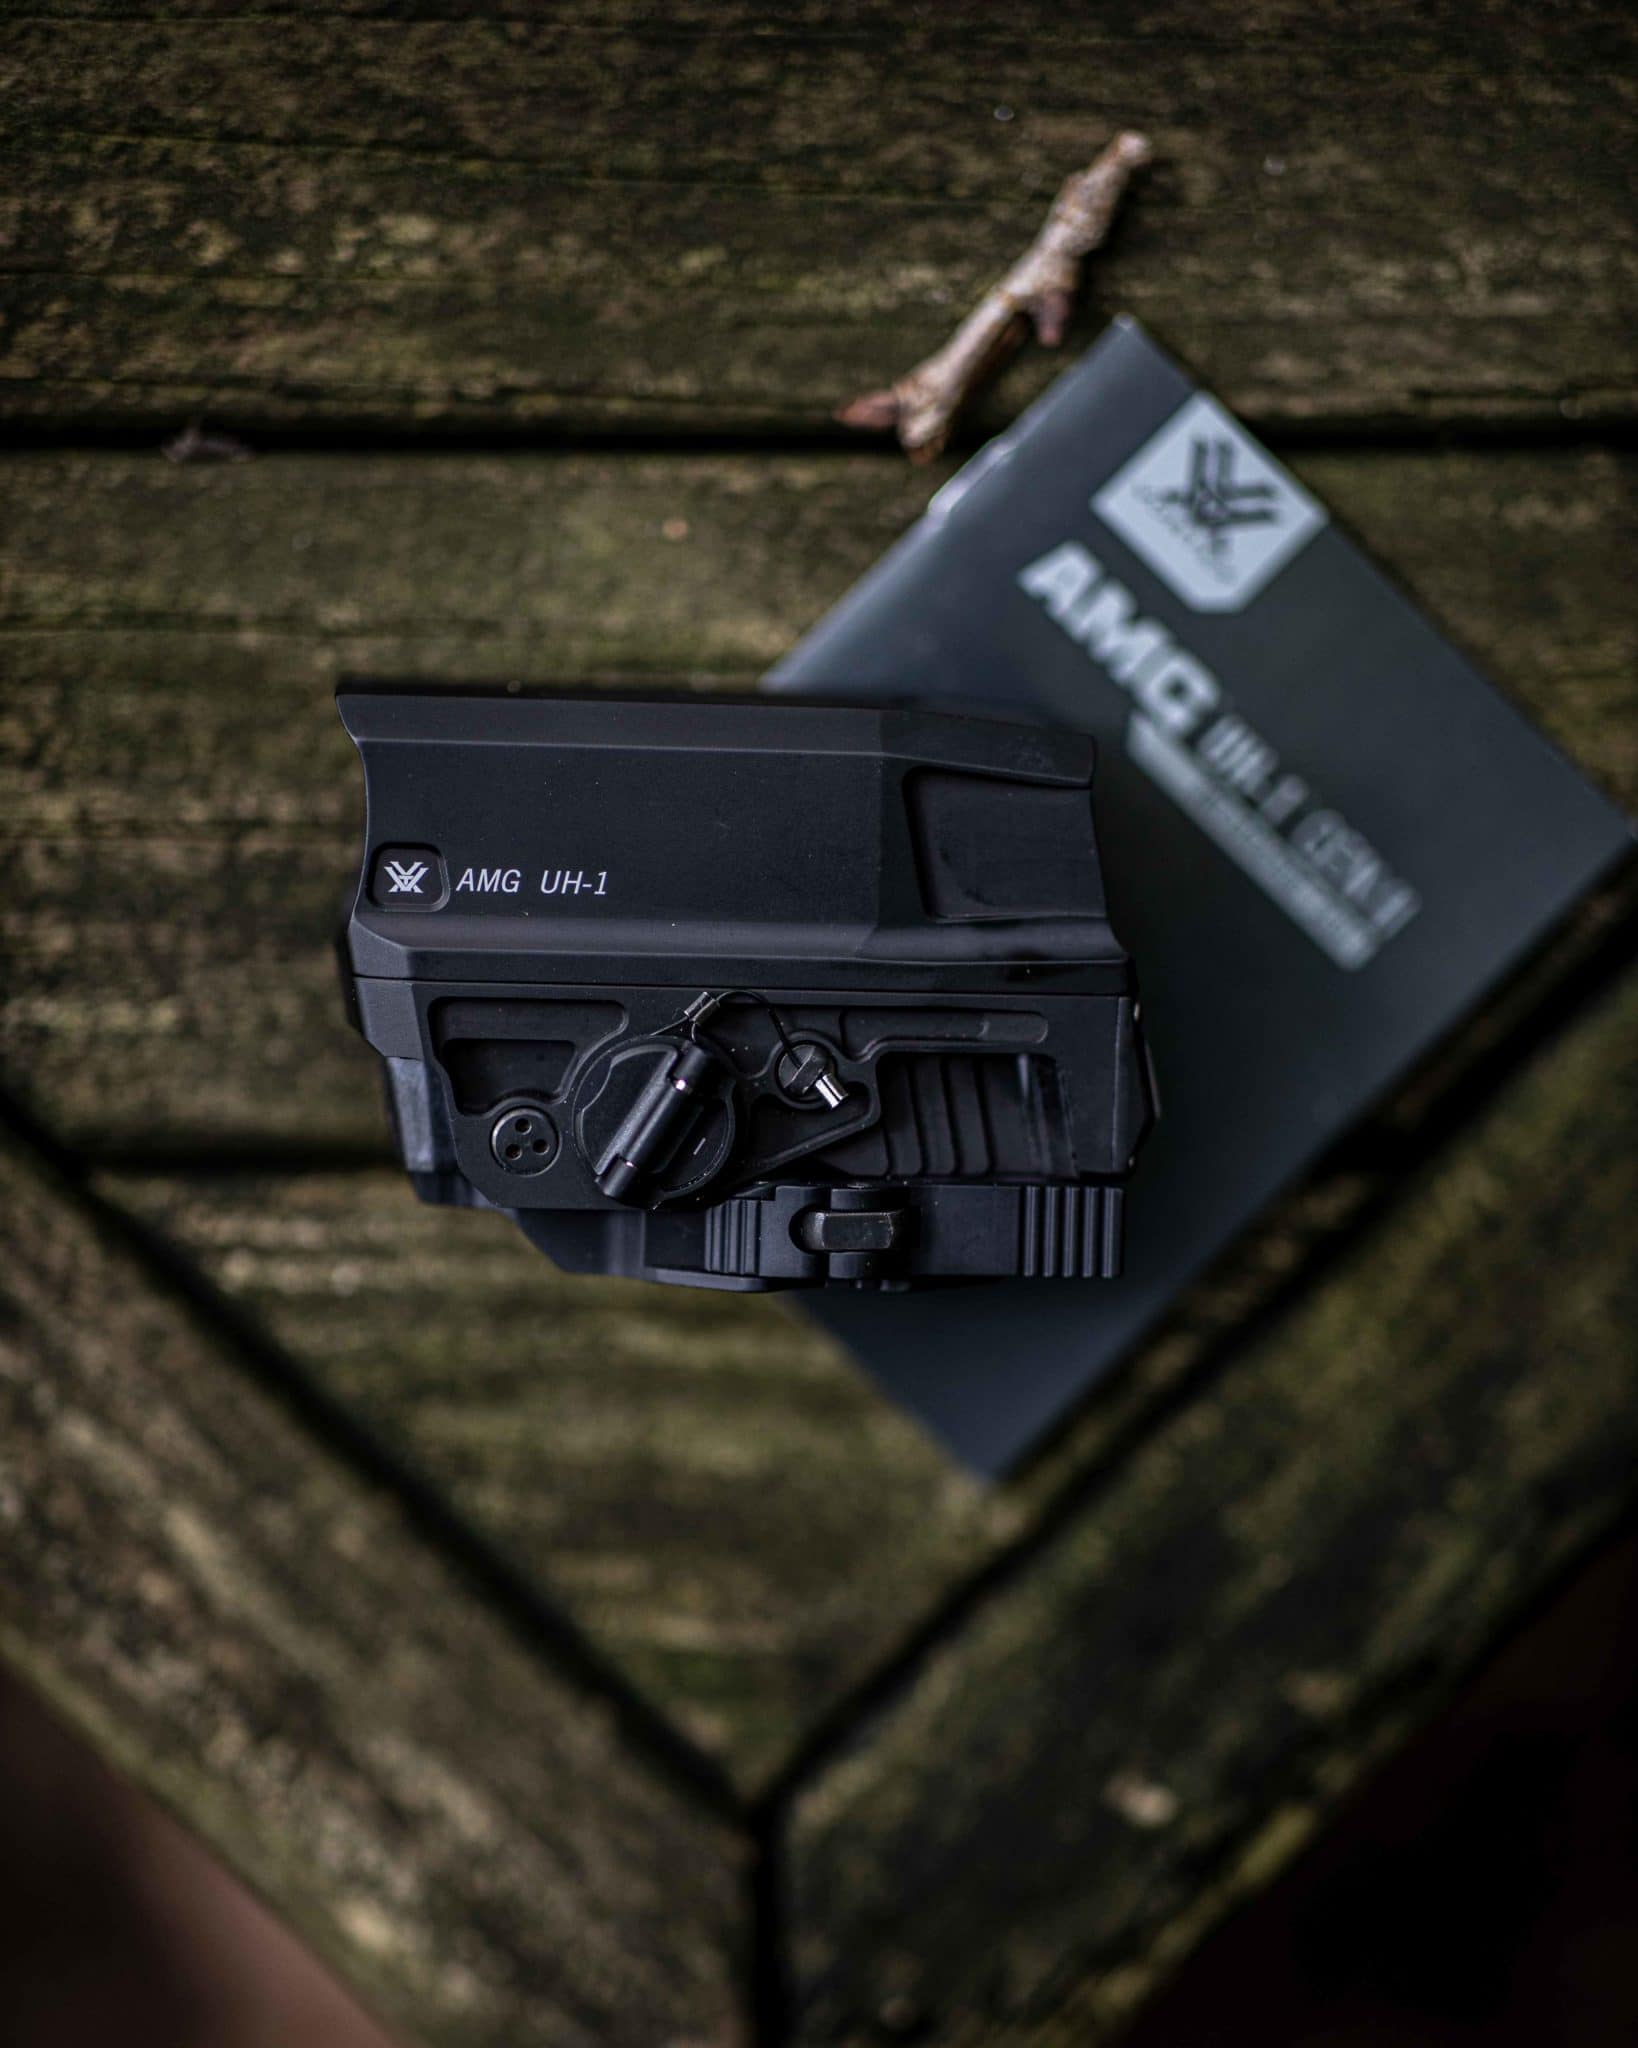
On top of the upper receiver is a potent optic setup. I went with the Vortex Optics UH1 Gen 2 Holographic sight for the primary optic. I am not running any sort of offset dot or any iron sights on this build. The UH1 Gen 2 is build like a tank and I have no durability concerns after nearly a year of carrying and running this build. The Reticle of this optic allows a lot of versatility although I will admit that I simply use the dot in the middle. I am not really into super fancy reticles and I did not find a need for the close distance triangle aiming point on the reticle. I simply aim high when I am shooting at 7-10 yards on paper with a carbine. The Micro 3X Magnifier is also an awesome addition. It does add some weight but with the throw of a lever I can remove it swiftly. This was a FAR better option than a legit LPVO for this build. Do I need a magnifier on a 10.3? No. Is it nice? Absolutely. Making 200 yard hits is a breeze with 3X magnification. The magnifier does enlarge the reticle, no issues there with me. The only downside to the micro 3X is the eye relief. You really need to get close up on the magnifier to see the whole picture. At first this threw me off until I trained more with it. All it takes is practice and you won’t have any issues. Spend time learning your gear and it will serve you well.


Currently I am running a blue force gear sling with inexpensive “no name brand” QD sling swivels. The Neomag Sentry Strap holds my sling into position when stowed keeping my sling tidy and accessible. I recommend adding these to any carbine or pistol with a sling.
Portability, reliability, accessibility were all major points I needed to cover with this build. I am 100% positive I did all of that and then some. I will note that I have not performed extensive accuracy tests. I simply zeroed at 50 yards and ran with it. I make easy hits at 200 on our Mini A-DAP system, that’s all I ask out of this build.
Overall this is currently my primary pistol. I take it literally everywhere I go. It lives and rides either shotgun in my Jeep or in my Gamut 2.0 bag from vertx. It is a confidence inspiring build that is capable and all around super refined. I hope this writeup helped you in some way, shape or form. If it did, please drop me an email directly at Info@tatargets.com. Let us know what you think about the build and if you have questions either email us or hit us up on Facebook or Instagram. I would be happy to answer any questions to the best of my ability.

Here is a parts list with links for this entire build:
- Geissele 10.3″ Upper Receiver $1080: https://geissele.com/rifle-parts/upper-parts/upper-receiver-groups.html
- Silencerco ASR Flash Hider $92.00: https://silencerco.com/shop/asr-flash-hider/
- Inforce WML W/IR $160.00: https://inforce-mil.com/product/wmlx-white-ir-gen2/
- Superlative Arms Carbine Length Piston Conversion $289.99: https://suparms.com/products/copy-of-750-adjustable-piston-system-carbine-length-solid-melonited-low-pro-ar15?variant=6404892997
- Vortex UH1 Gen2 $799.99 MSRP: https://vortexoptics.com/red-dots/vortex-amg-uh1-gen2/vortex-amg-uh1-gen2-holographic-sight.html
- Vortex Micro 3X Magnifier $449.99 MSRP: https://vortexoptics.com/vortex-micro-3x-magnifier.html
- Geissele SD-E (Super Dynamic Enhanced) $240.00: https://geissele.com/super-dynamic-enhanced-trigger.html
- Law Tactical FDE folding Adapter $269.99: https://www.lawtactical.com/ar_folding_stock_adapter_gen_3_m_p/99312.htm
- SBA3 Pistol Brace $169.99: https://www.sb-tactical.com/product/sba3/
- Blue Force Gear Sling $49.00: https://www.blueforcegear.com/vickers-sling
Total Approximate cost to build this AR15: Approximately $3500.00 USD.

Watch my FULL YouTube Review Here:
Jared Daub
Vice President of Design/Marketing