300 Blackout Build Update
- July 2, 2018
- By tatargets
The Second Phase of the 300 Blackout SBR Evolution.
Change is Necessary. Sometimes we change simply to change, other times it is more strategic. Regardless of the reasons why, change is inevitable and a healthy part of our lives. Our rifle platforms are no different, welcome to phase 2 of the 300 blackout SBR build.
Many of you took the time to read through my previous blog post that I posted up here June 13, 2018. It is the most read blog on our site to date, and definitely the one that I get the most questions sent in about. This is the one year anniversary of that blog (ok, a little late I know, but I’m close enough, right?) and I am writing this to show everyone the second part of the journey of this SBR build. Before we do that, take a moment to read the previous blog post HEREso you can get familiar with the background of this setup. Without further ado, I bring you the new face of my 7.5″ 300 blackout SBR build:
I get messages every week about this build, and I love sharing the journey and what I have learned. This is the next evolution of my 300 Blackout Build. Enjoy.
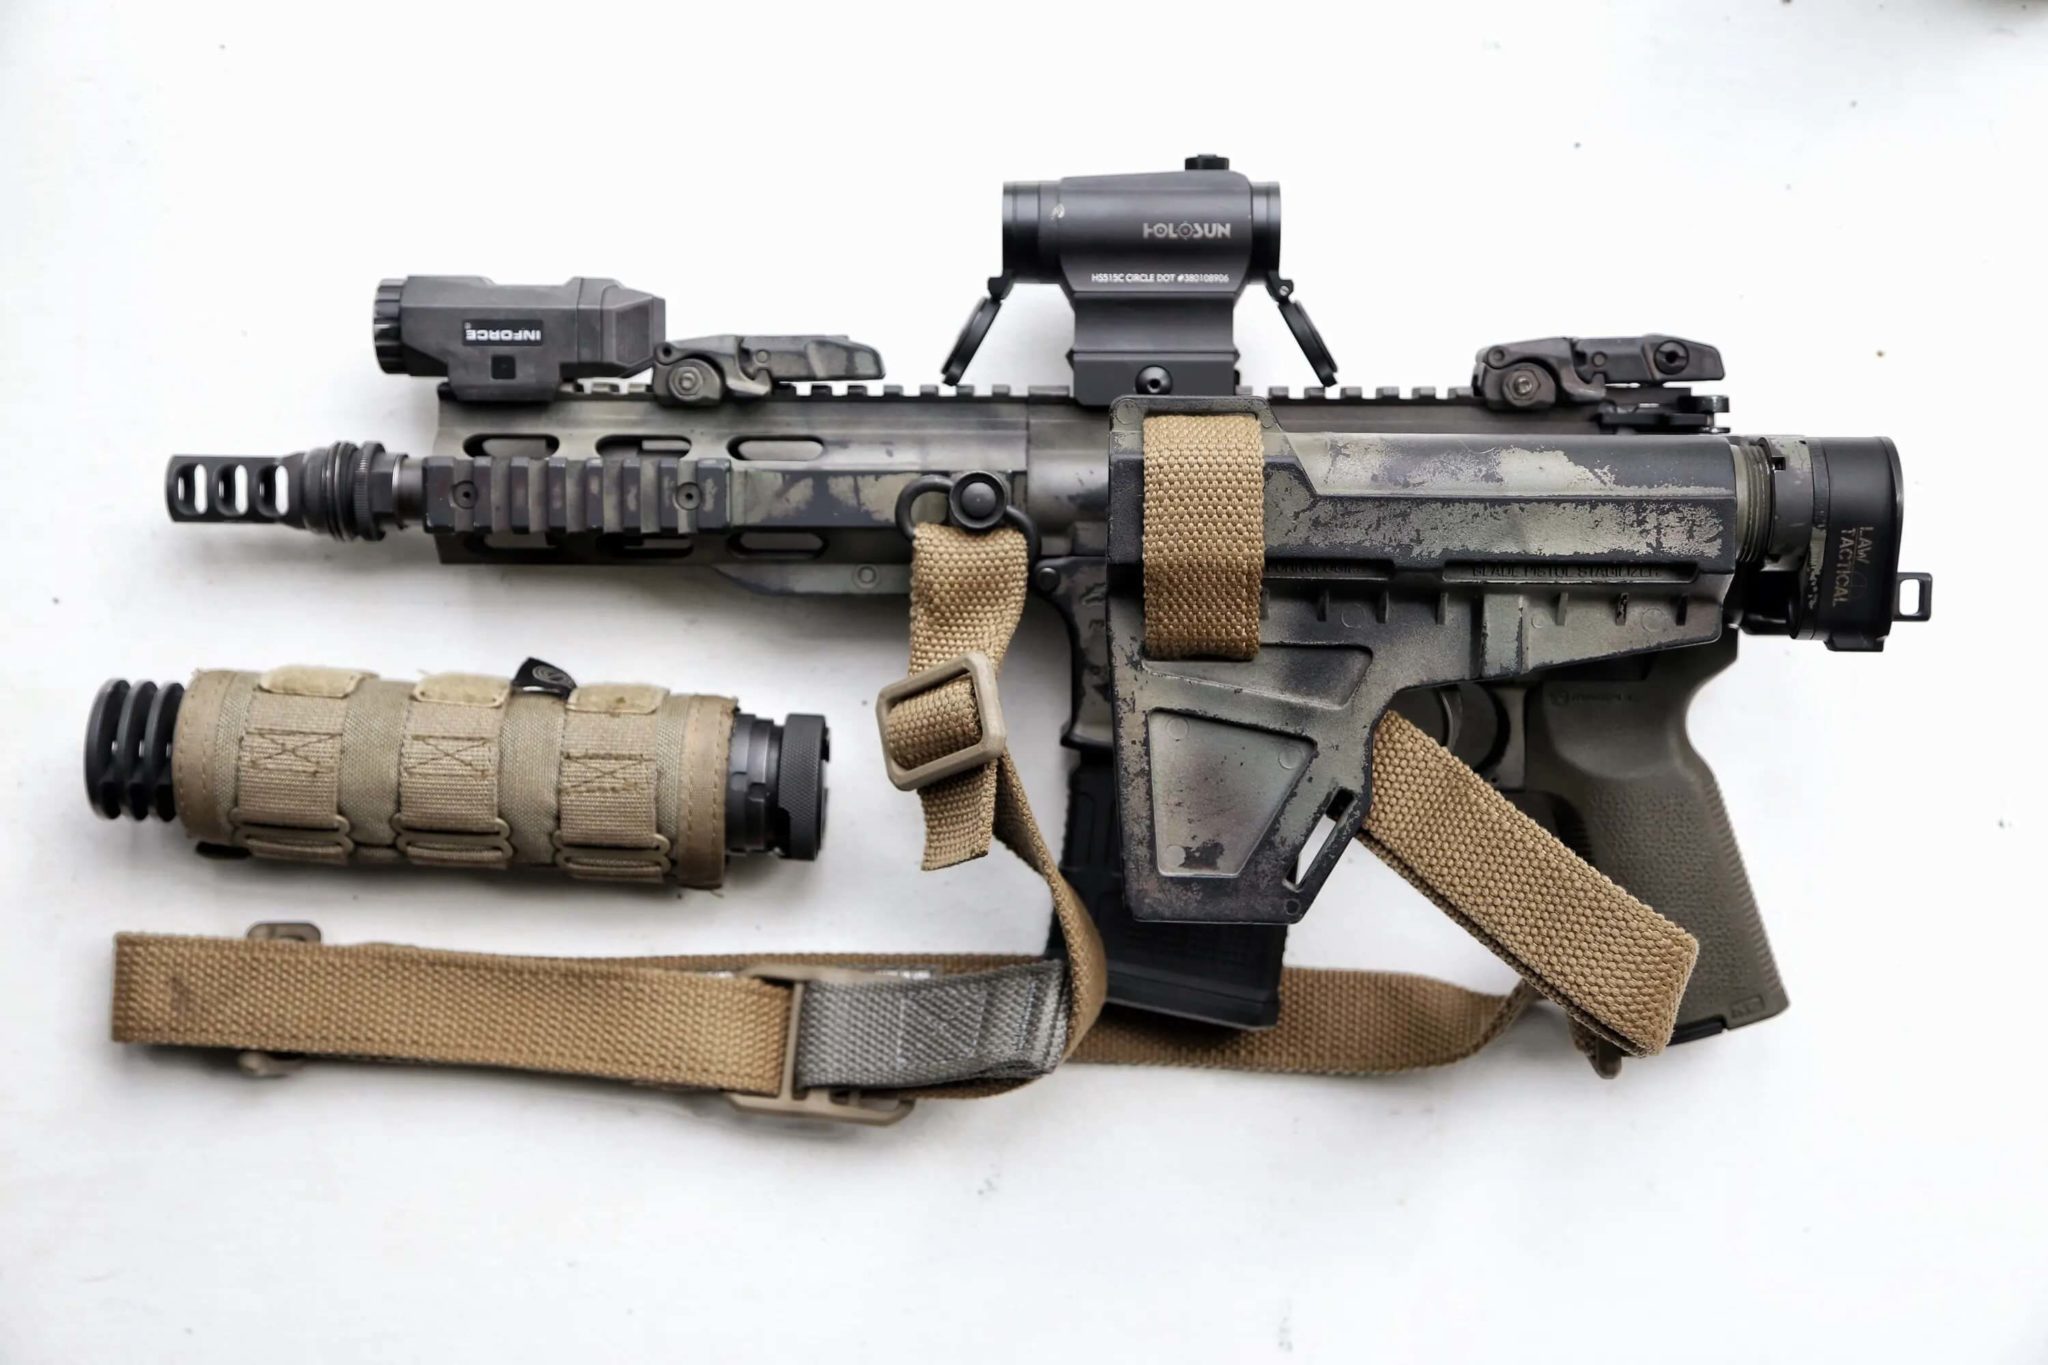
PHASE 1:
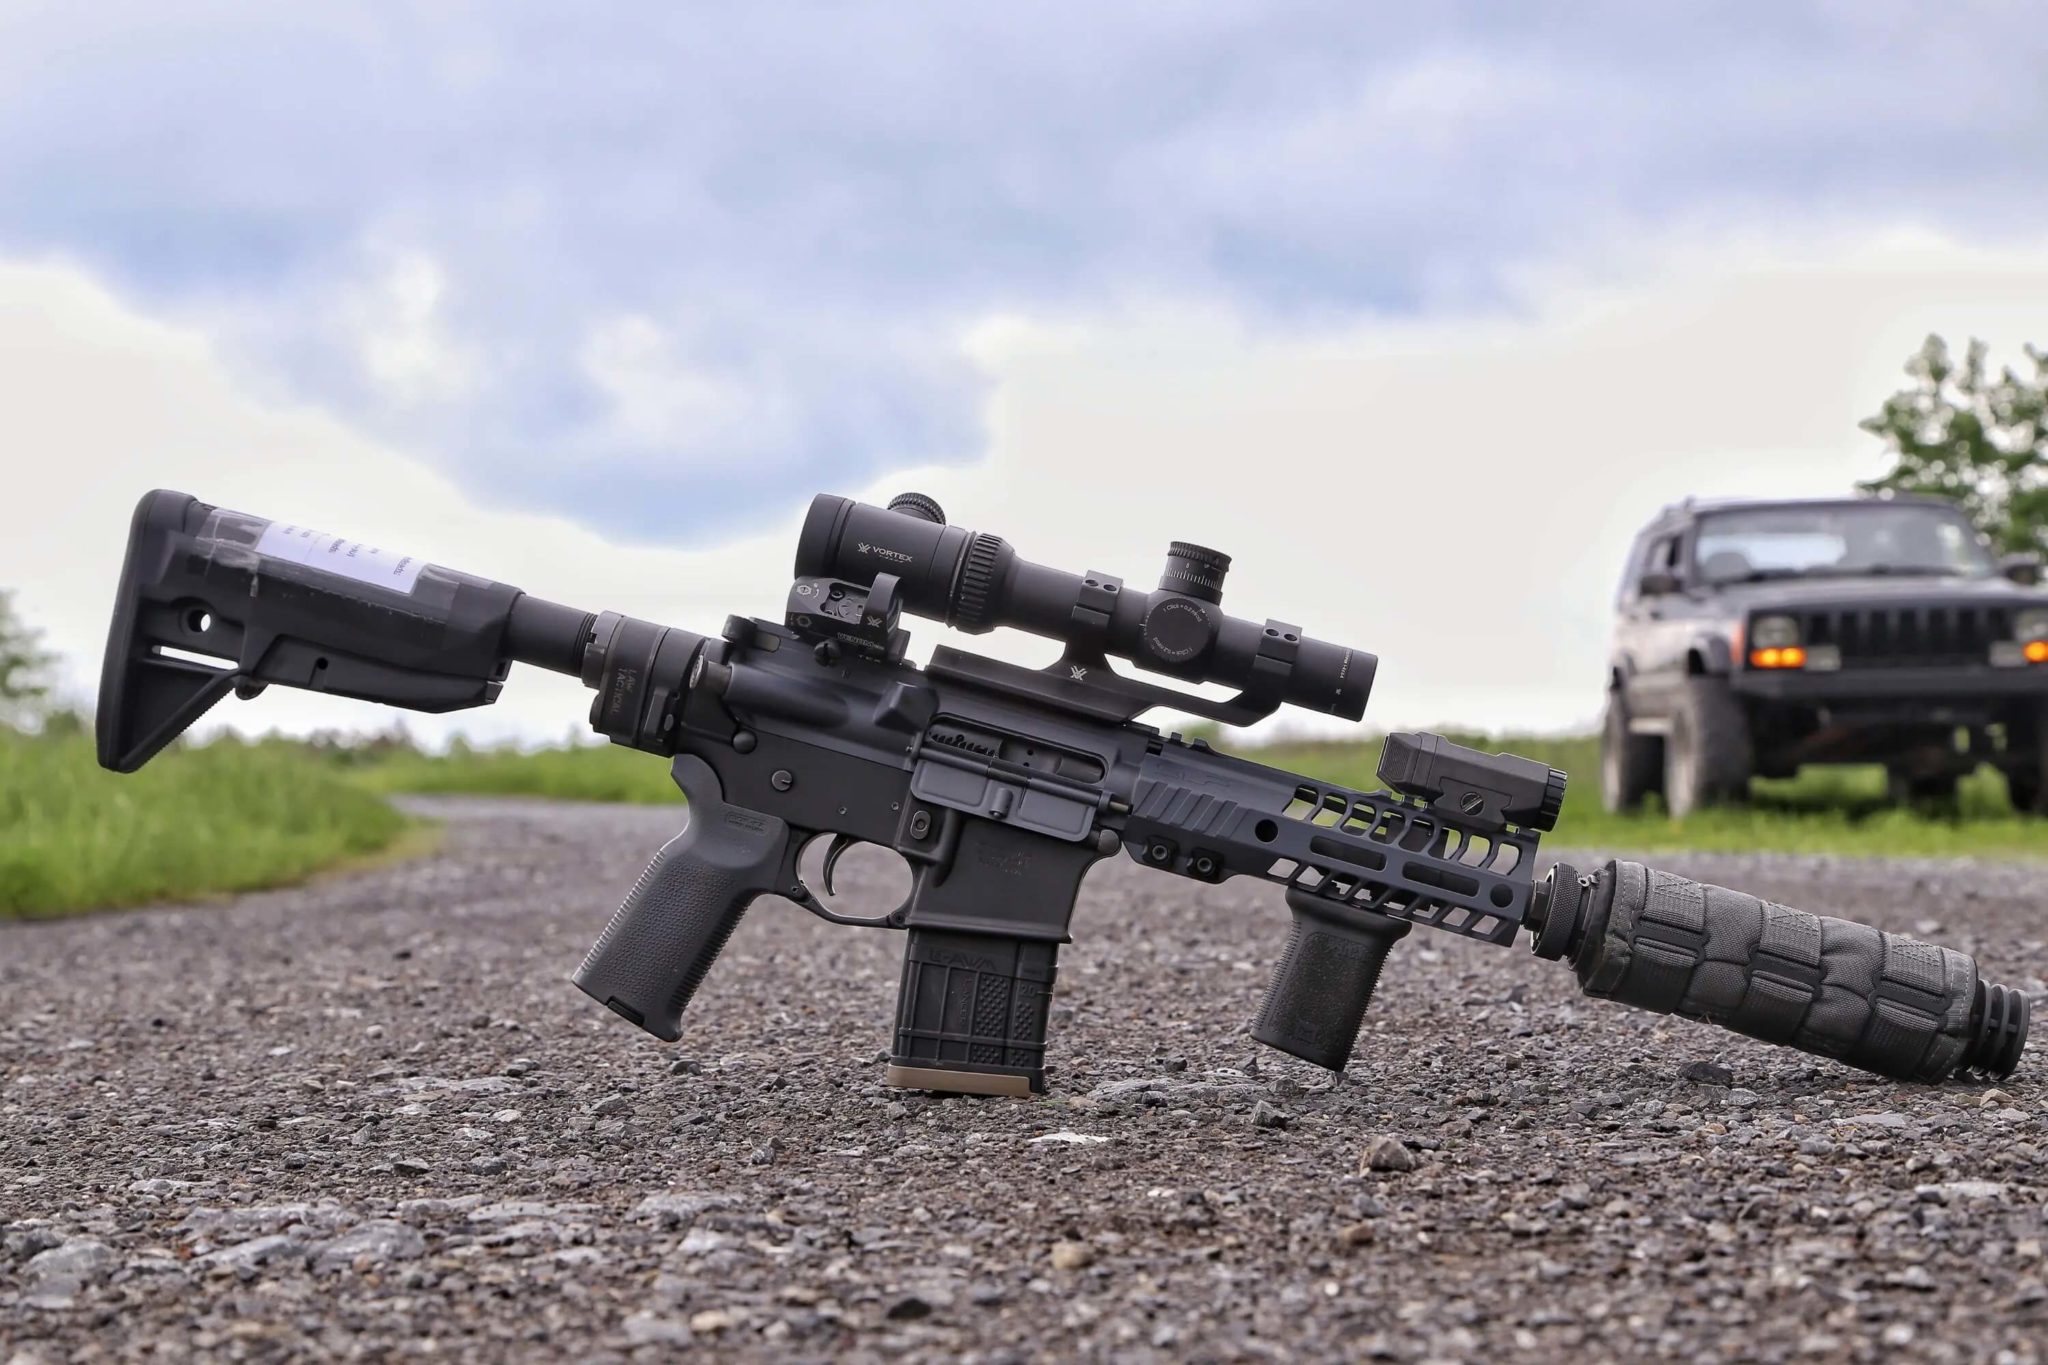
PHASE 2:
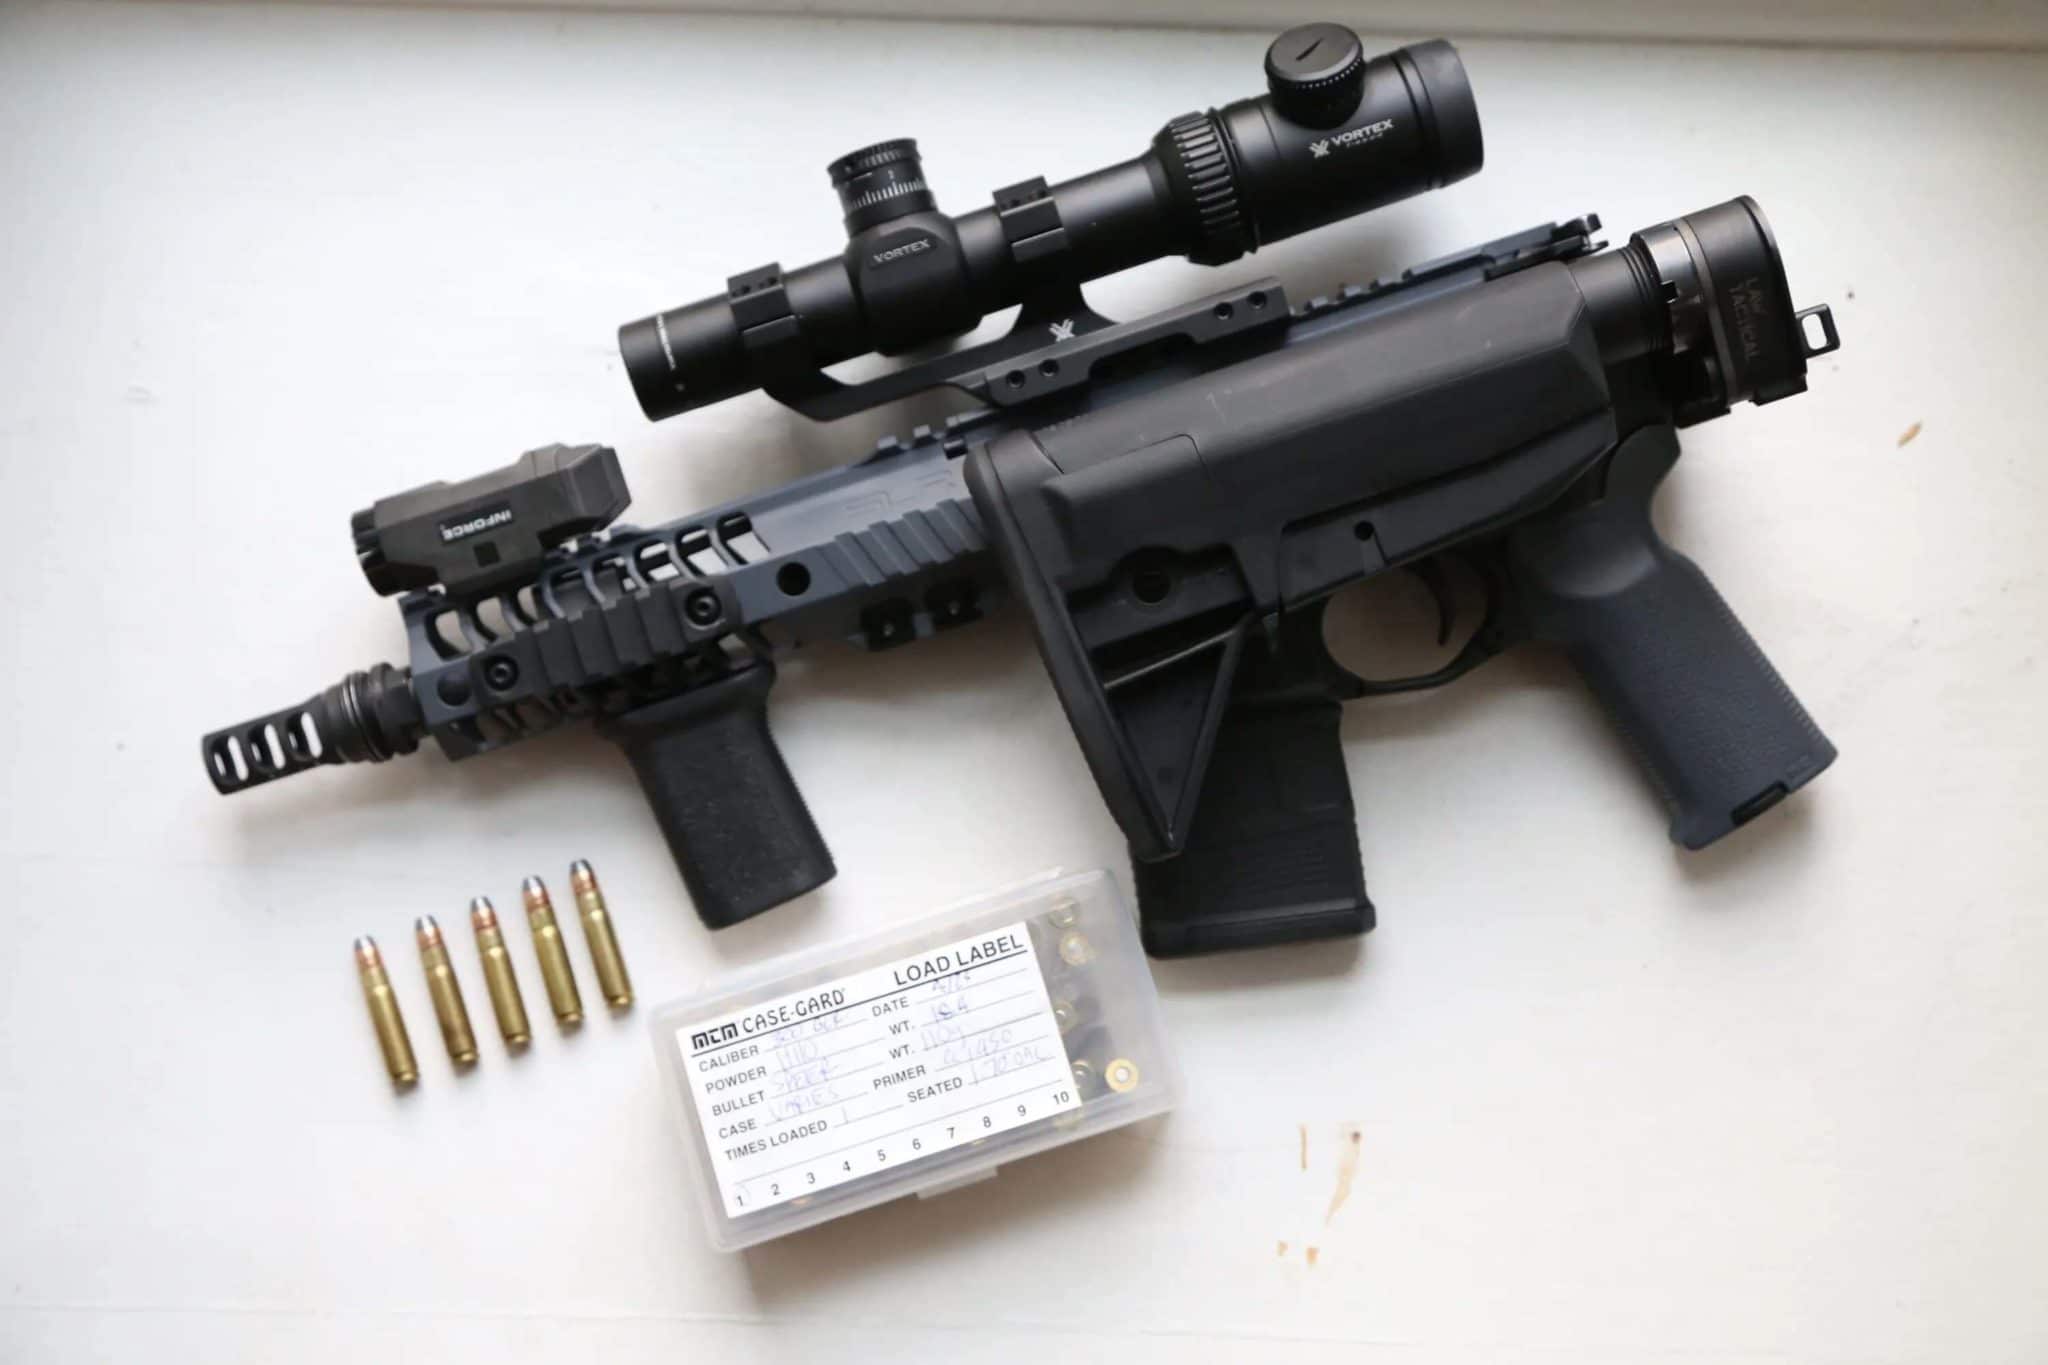
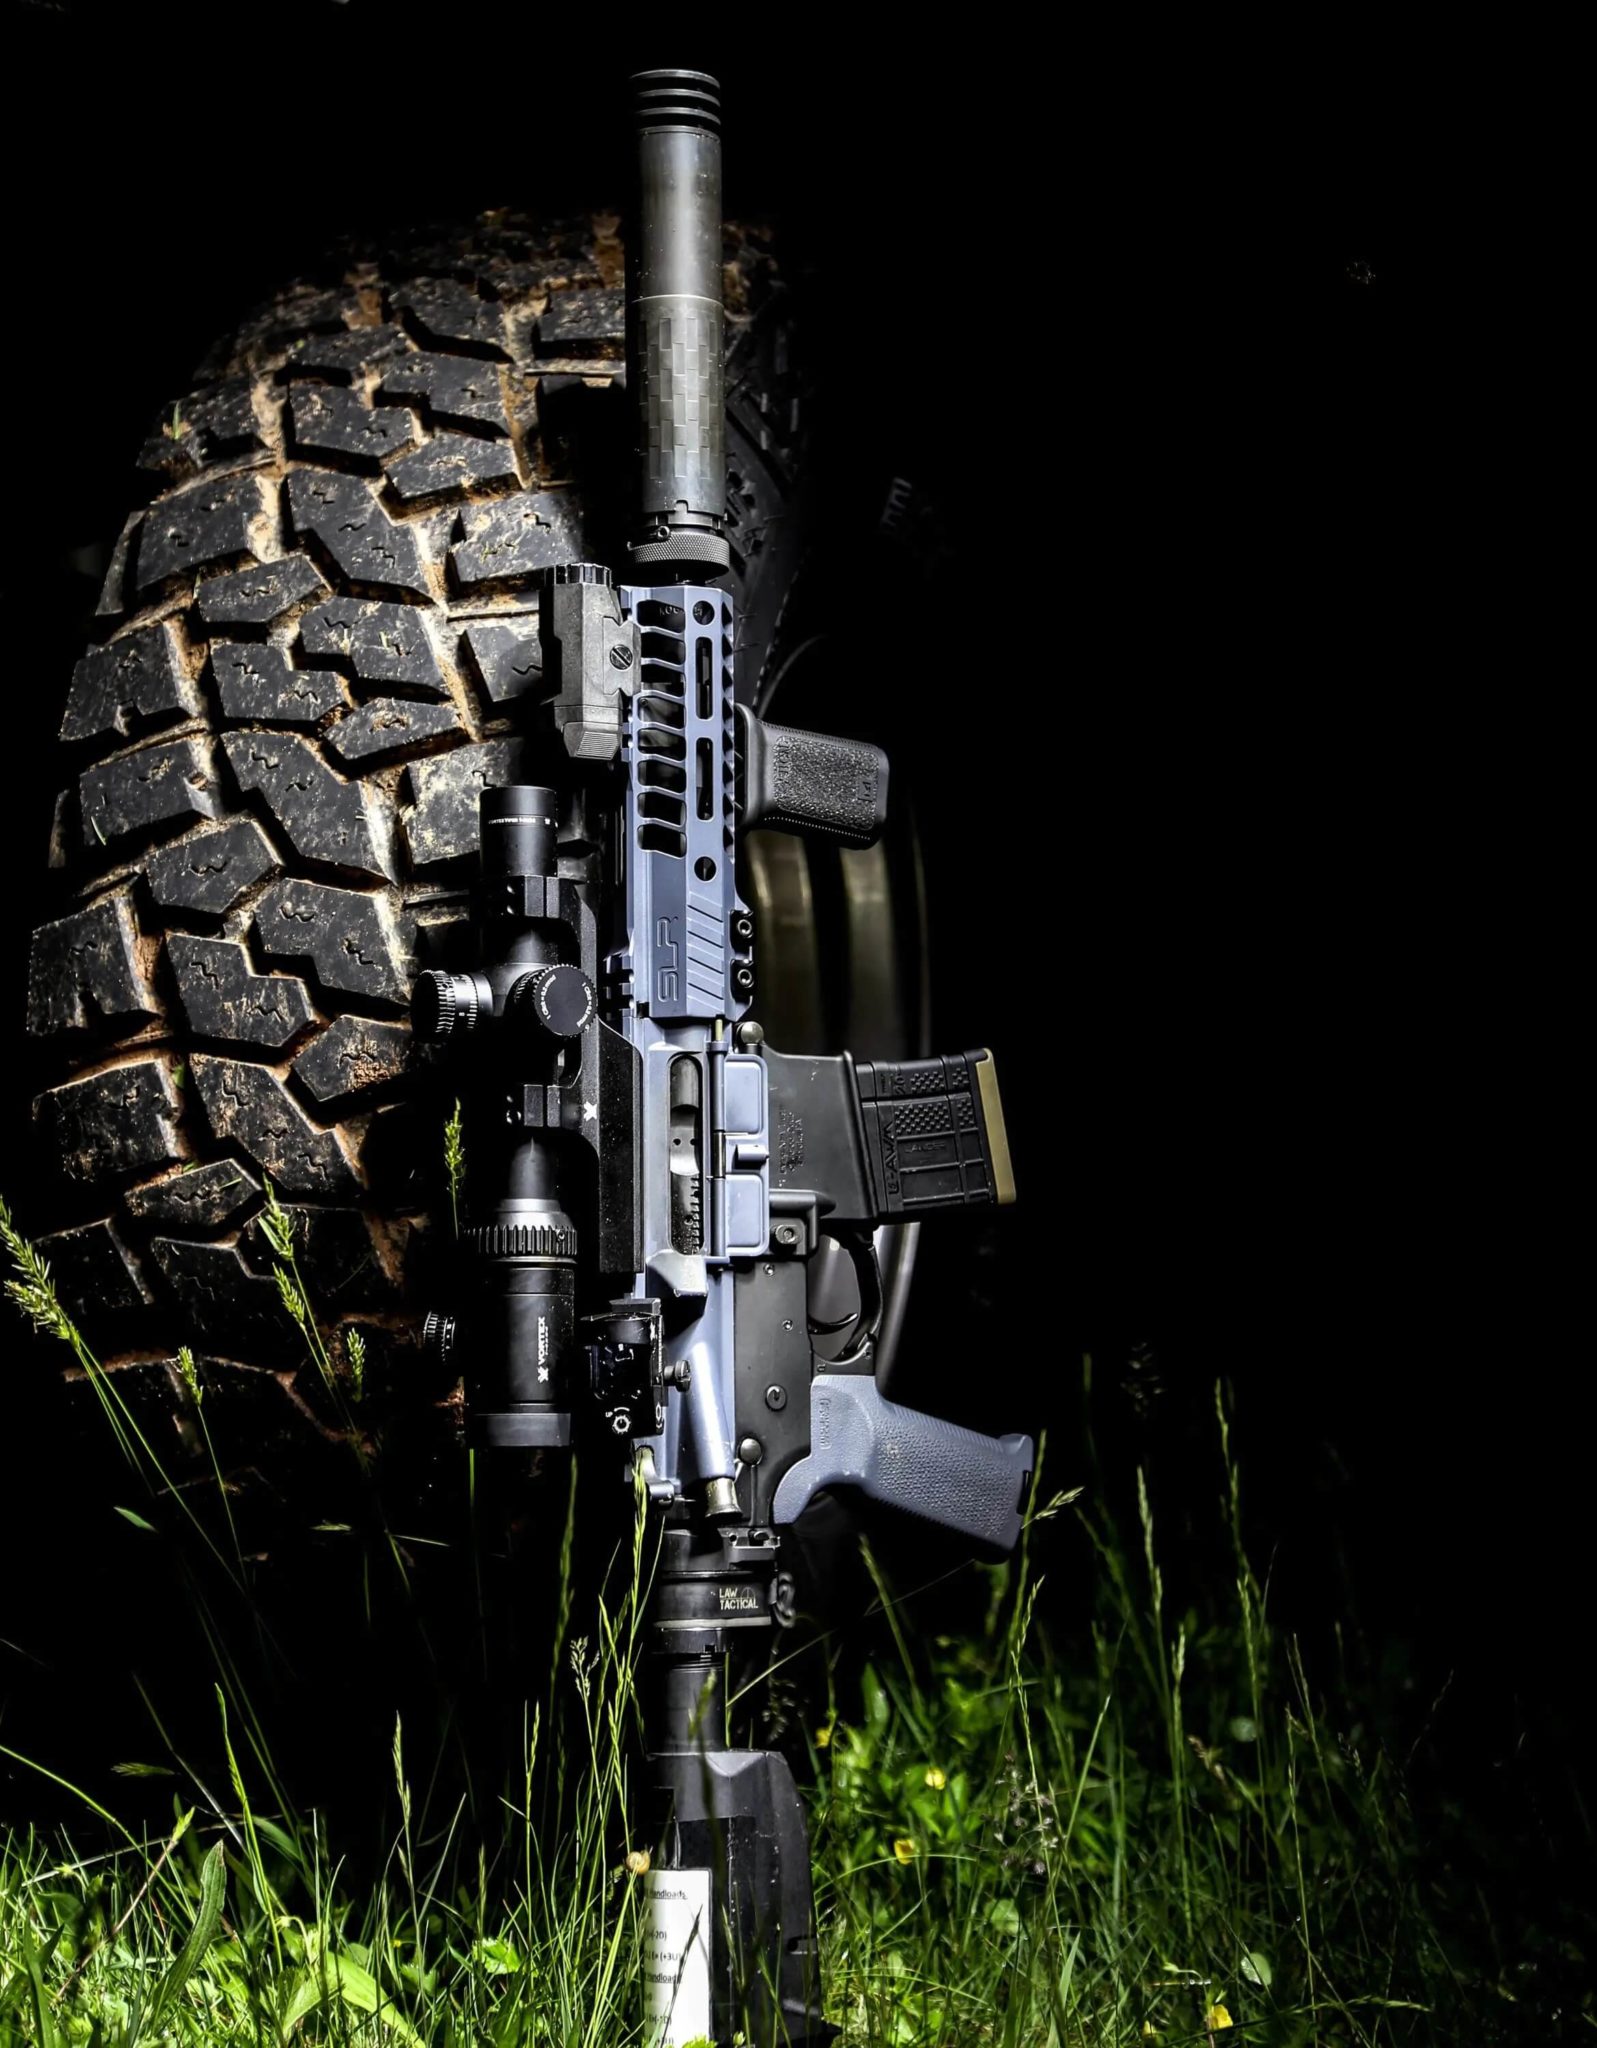
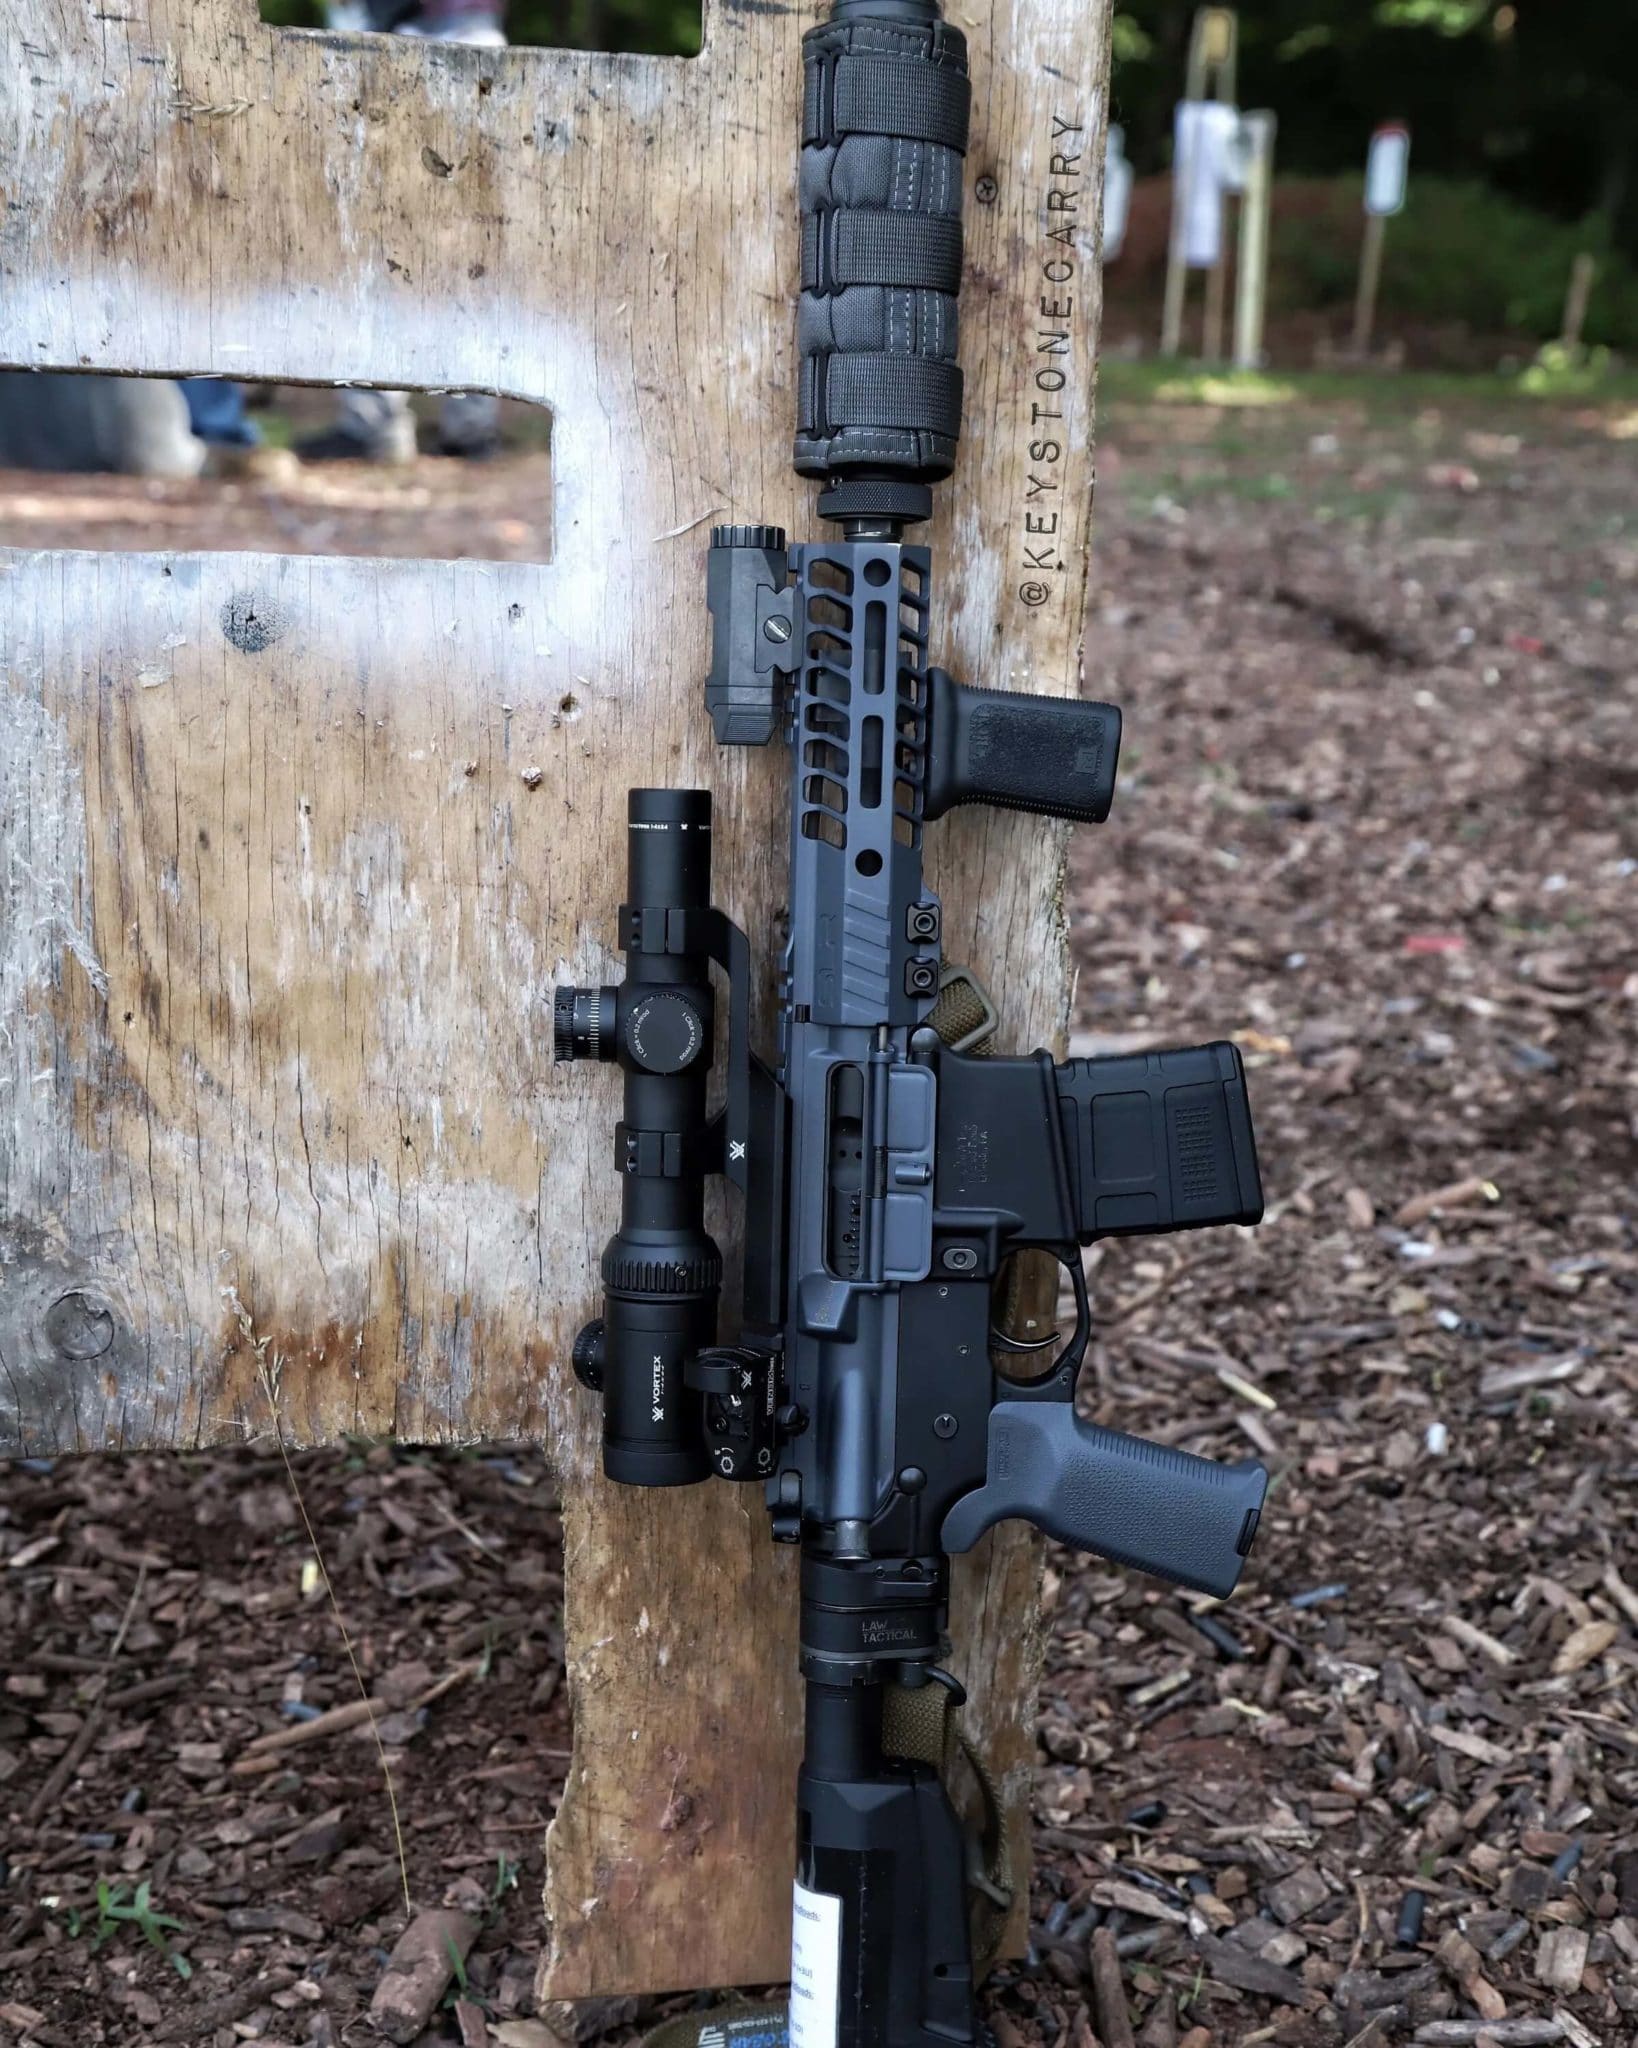
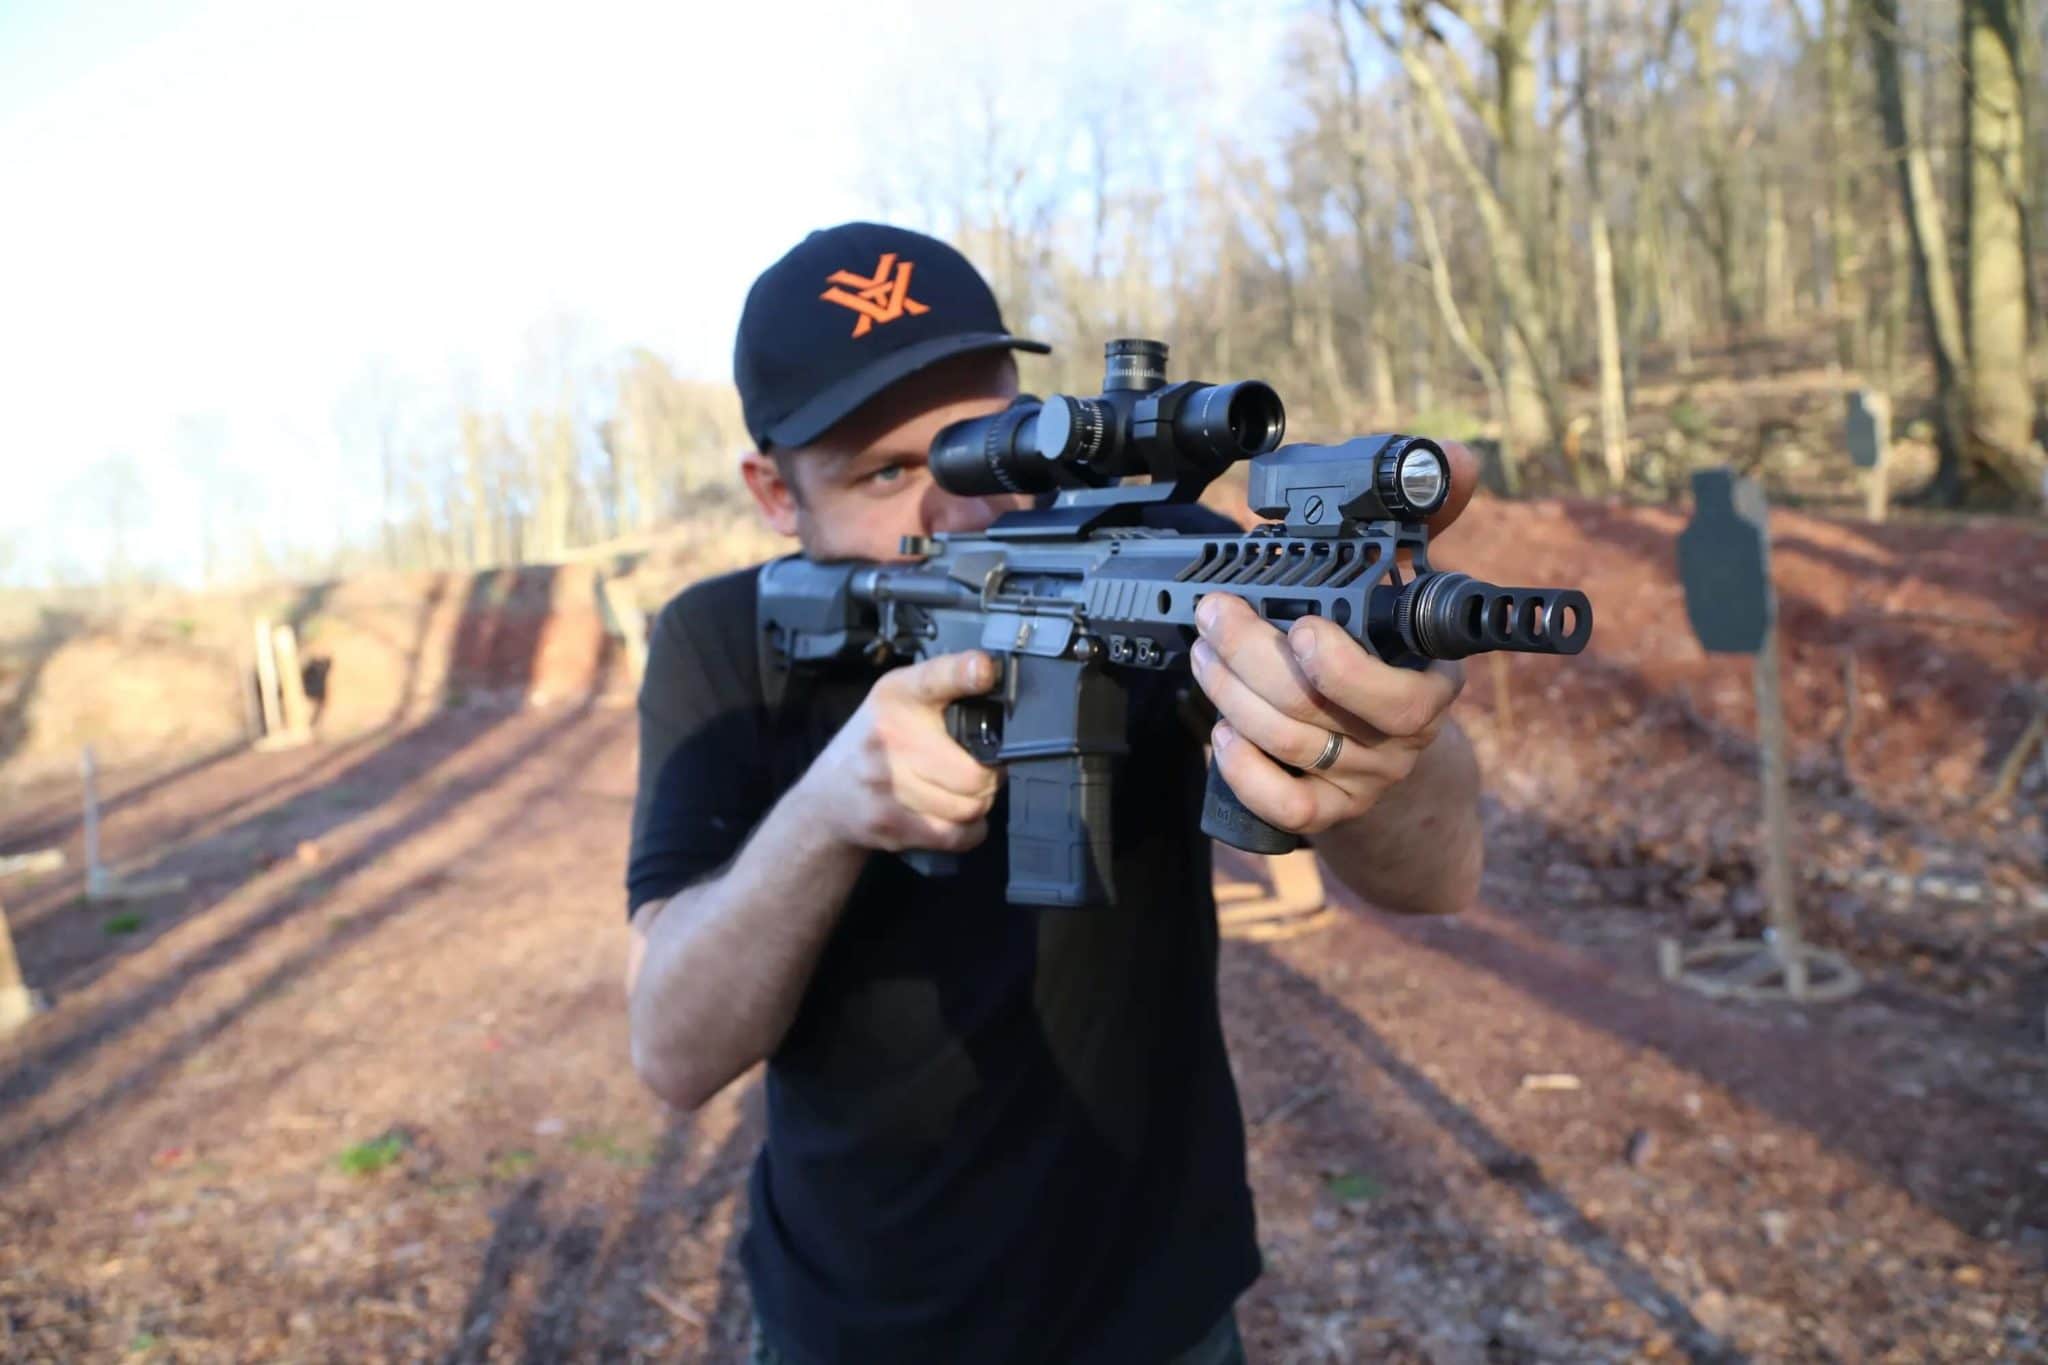
From first glance the most striking changes are the finish/color, the rail, and the optic, so let’s start with those. Previously I had been running a Holosun 515C red dot on my blackout, and for the time it did everything I wanted it to do. What made me switch to a variable powered optic, aside from the luxury of being able to run at higher magnification, was the fact that this is my primary predator hunting rifle and a 1x red dot simply wasn’t cutting it for me to identify my game and take safe shots at distance. I opted to go with a gen 1 Vortex Viper PST for the scope. My initial thoughts were that a 4x scope would be perfect for a 0-200 yard gun and the compact size of this scope would still allow me to fit the rifle in my Vertx Gamut bag folded. The price point of the Gen 1 Viper PST was also much lower than the Gen 2, although admittedly if my budget would have allowed I would have gone with the Gen 2 for the higher magnification. Running a variable powered optic presented a challenge that I wanted to solve: I wanted to have some form of backup sights in case my primary optic failed me or was fogged up/dirty when hunting. I thought about running iron sights offset but I quickly determined that those would not allow me the quickest, most accurate canted shots. I have had foxes flank me and a quick, immediate shot is necessary to land the shot, so I wanted a red dot on an offset 45 degree mount. What I went with is the Venom 3 MOA red dot on one of vortex’s offset 45 mount. I simply mounted it to the picatinny on my upper, close to the forward assist.
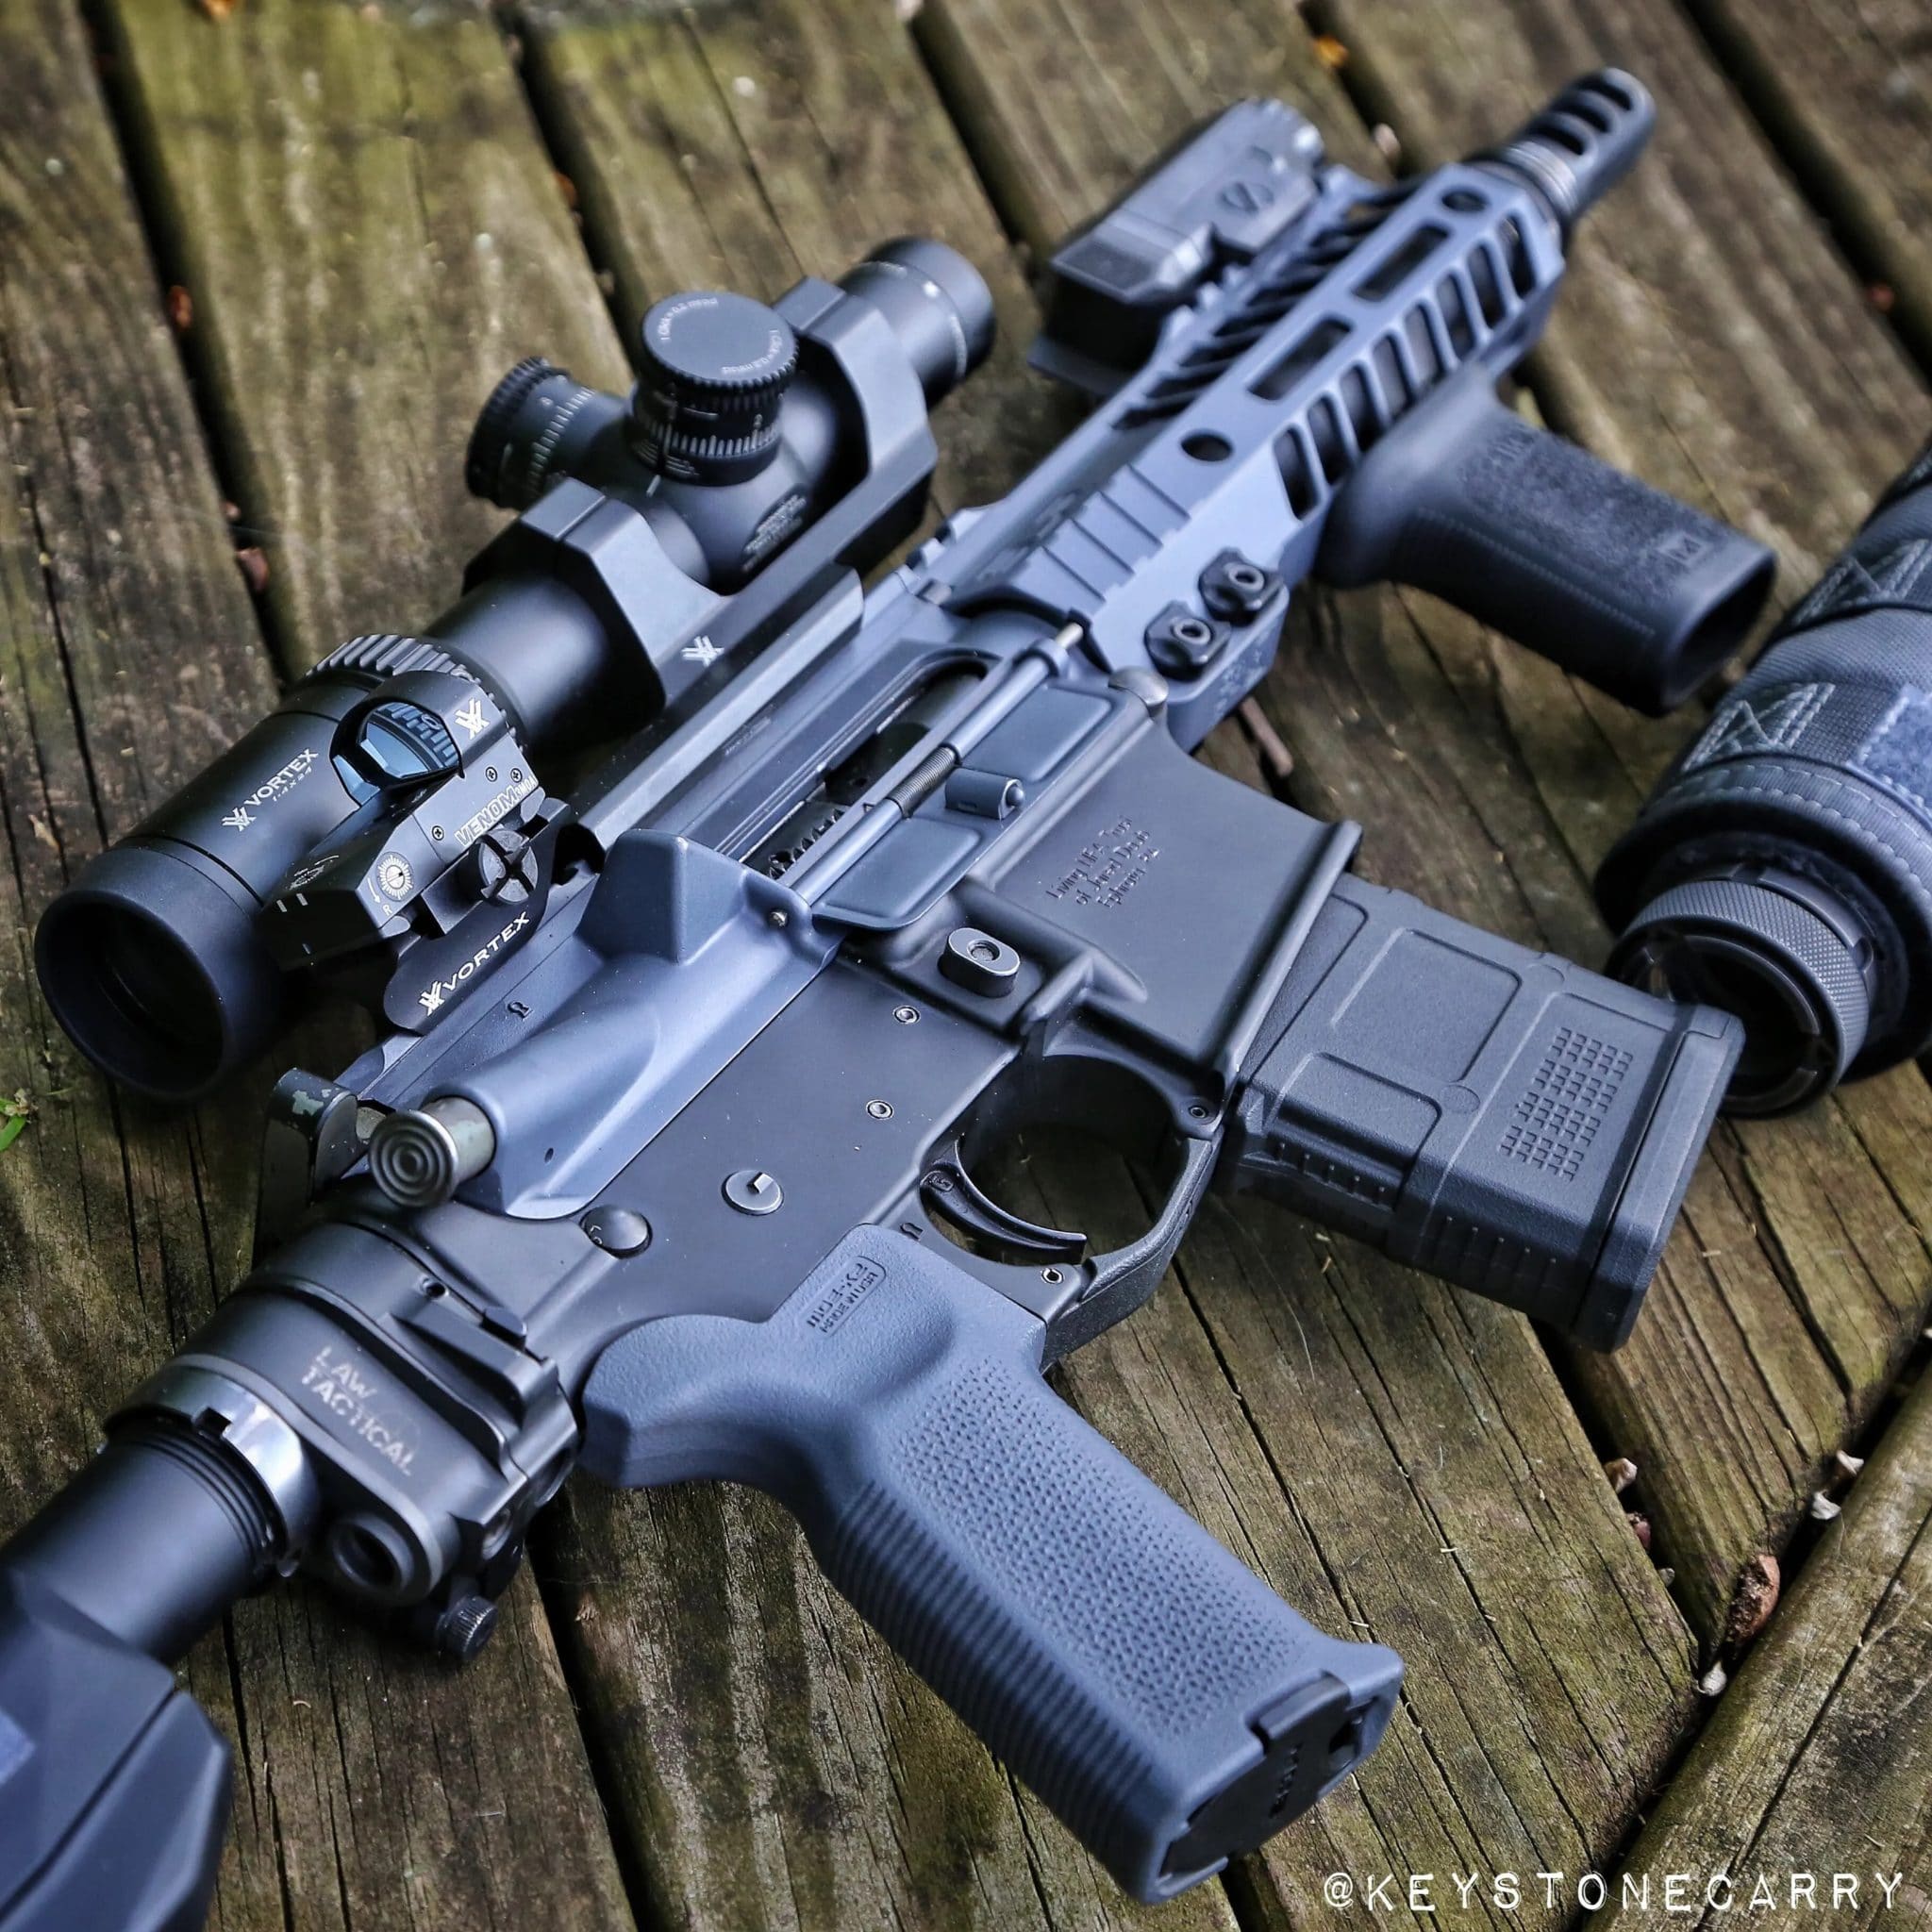
Due to the short configuration of my rifle, and the style of rail I am running (which I will go into later) I do not have much room to fit accessories. This was my reasoning toward running the offset red dot to the rear of the scope. I simply had more room to work with and it works very well for me personally. Another option would have been to mount the optic up further, although space is much more limited near the front of the scope. The only major issue I have with the dot where it is, is that powder residue gets all over the glass after about 500 rounds of suppressed fire. My solution is to simply clean the glass during and after every range session. Keep that in mind if you opt to mount your red dot like I have. Dirty glass = obscured optic. Keep it cleaned so you can keep running. The above picture also shows my preferred trigger on this platform: The Geisselle SSA-E two stage trigger. I retained this trigger as the build progressed, although admittedly I am trying out a few different triggers for experimentation purposes as we speak. The LAW tactical folding stock adapter is also retained, so nothing new there. The Magpul grip was also retained. I simply brought it into the future with a dash of Combat Grey Cerakote. Call me crazy, but I like the magpul grip. It is inexpensive and I feel like I get a good grip on it. I didn’t need anything super fancy here.
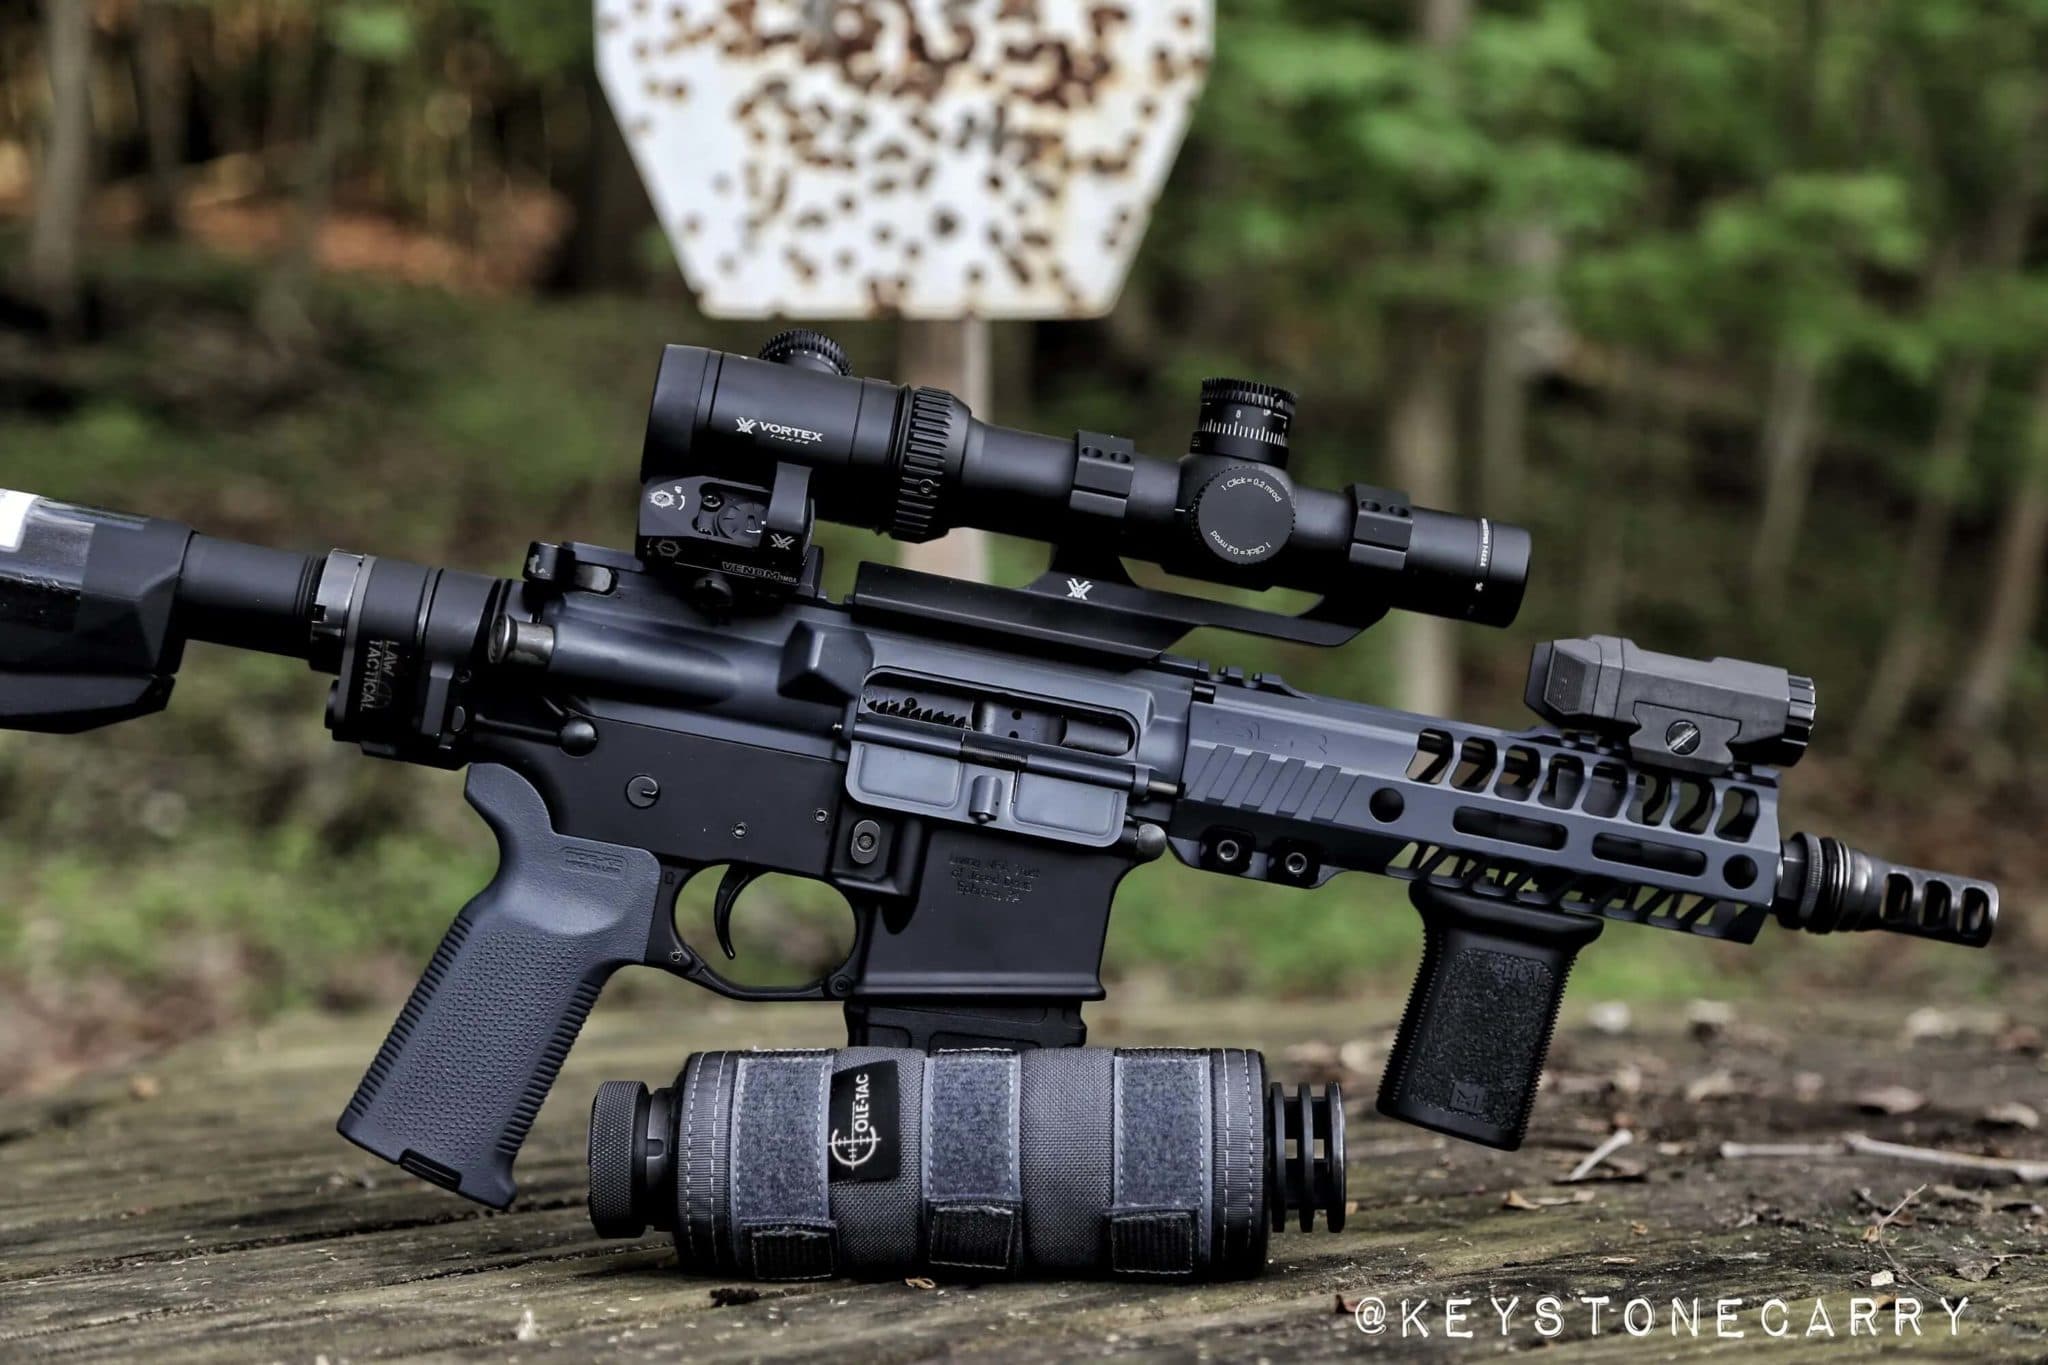
Moving up to the front of the rifle, it is obvious that I have changed a few items. I still run the inforce APL pistol light on the rail up top, and my reasons have not changed from last year. I like the paddles on this light, it is short and light, and can be used with either hand. Was it meant for rifles? No. But it has been holding up great and puts out some decent lumens for close range work. If I am hunting I will note that I usually swap this out for one of my 400 Lumen WML’s for added distance reach. I am still running the Silencerco ASR brake on this build, and I still hate it. Ok let me clarify: I hate ALL brakes. I wouldn’t even be running this brake if it wasn’t for the fact that silencerco includes it in the Omega suppressor’s packaging. Eventually I plan on swapping it our for an ASR flash hider, which I run on all my other rifles for suppressor compatibilty. I also snagged a new Cole Tac Suppressor wrap that matches the new Cerakote. This wrap has an inner and outer layer to help fight the heat that a suppressor puts off. Trust me, if you run a suppressor, you need a cover. It will help protect from mirage and protect your vehicle upholstery and backpacks when you throw the can in your car smoking hot. The wrap helps protect agains all of those things and looks cool on top of all that. I opted to run a SLR Rifleworks MLOK rail on this blackout. I met the owner, Todd, at one of the shows we were out at and I checked out his rails and immediately fell in love. This is the 6.7″ Helix Rail. It is tiny, modular, and extremely light weight. Much lighter than the factory EXT 7″ rail from Anderson Manufacturing and the MLOK offers more adaptability than my previous rail.
Looks aren’t everything, but it’s OK to have a rifle that looks as good as it shoots.
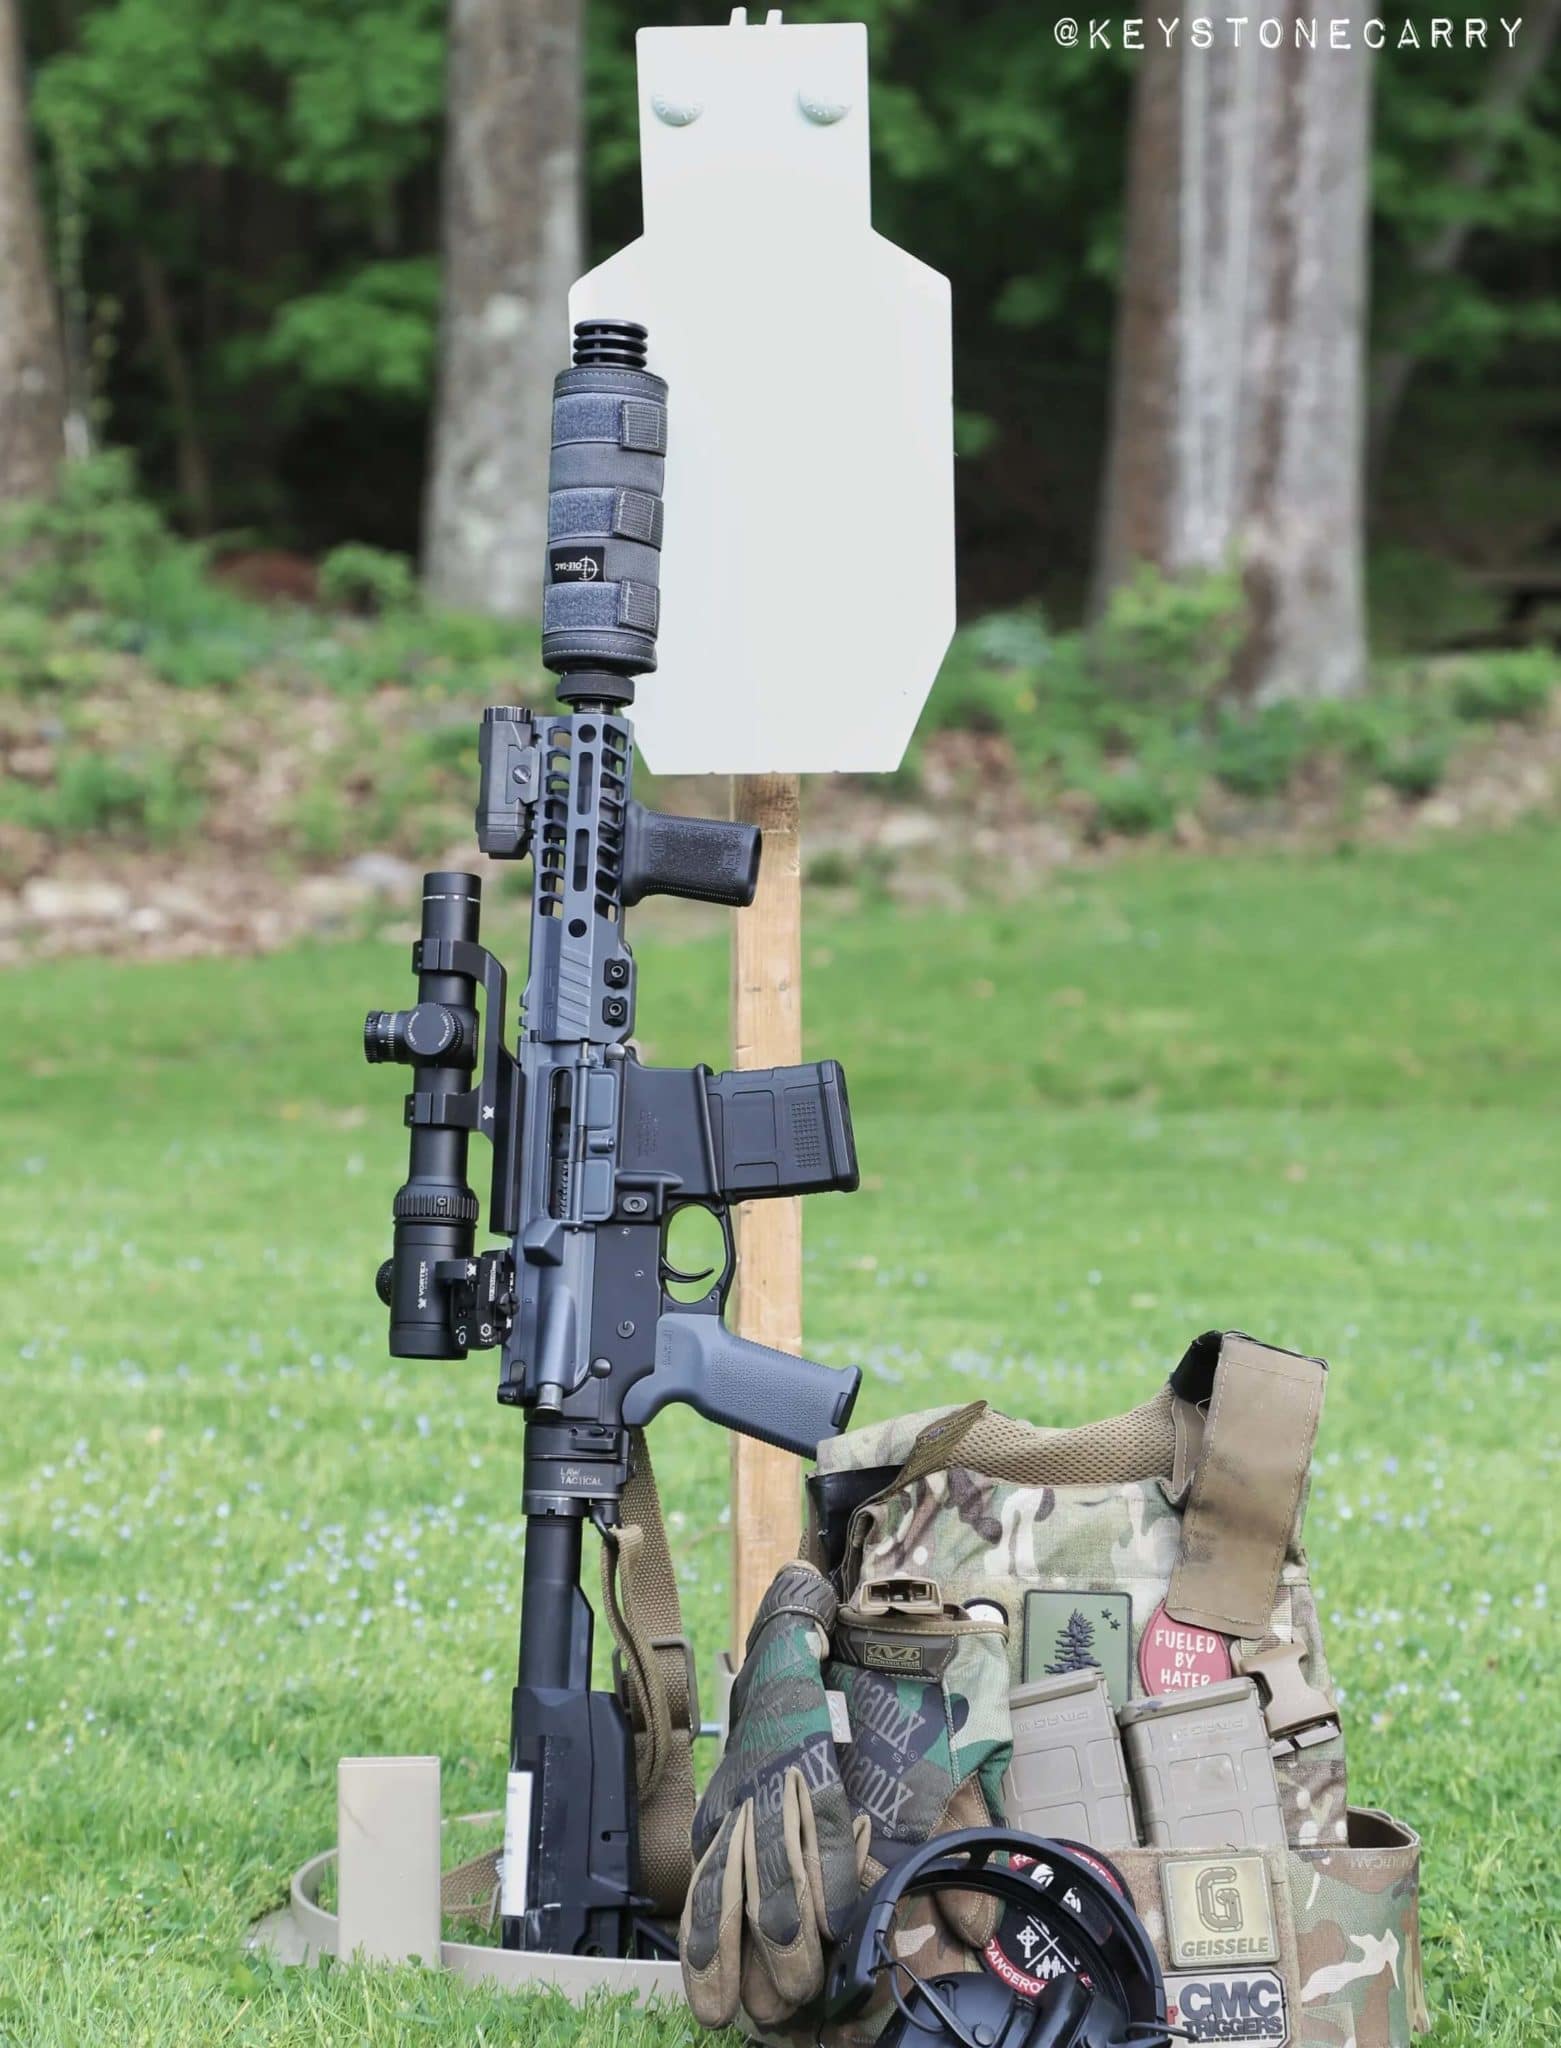
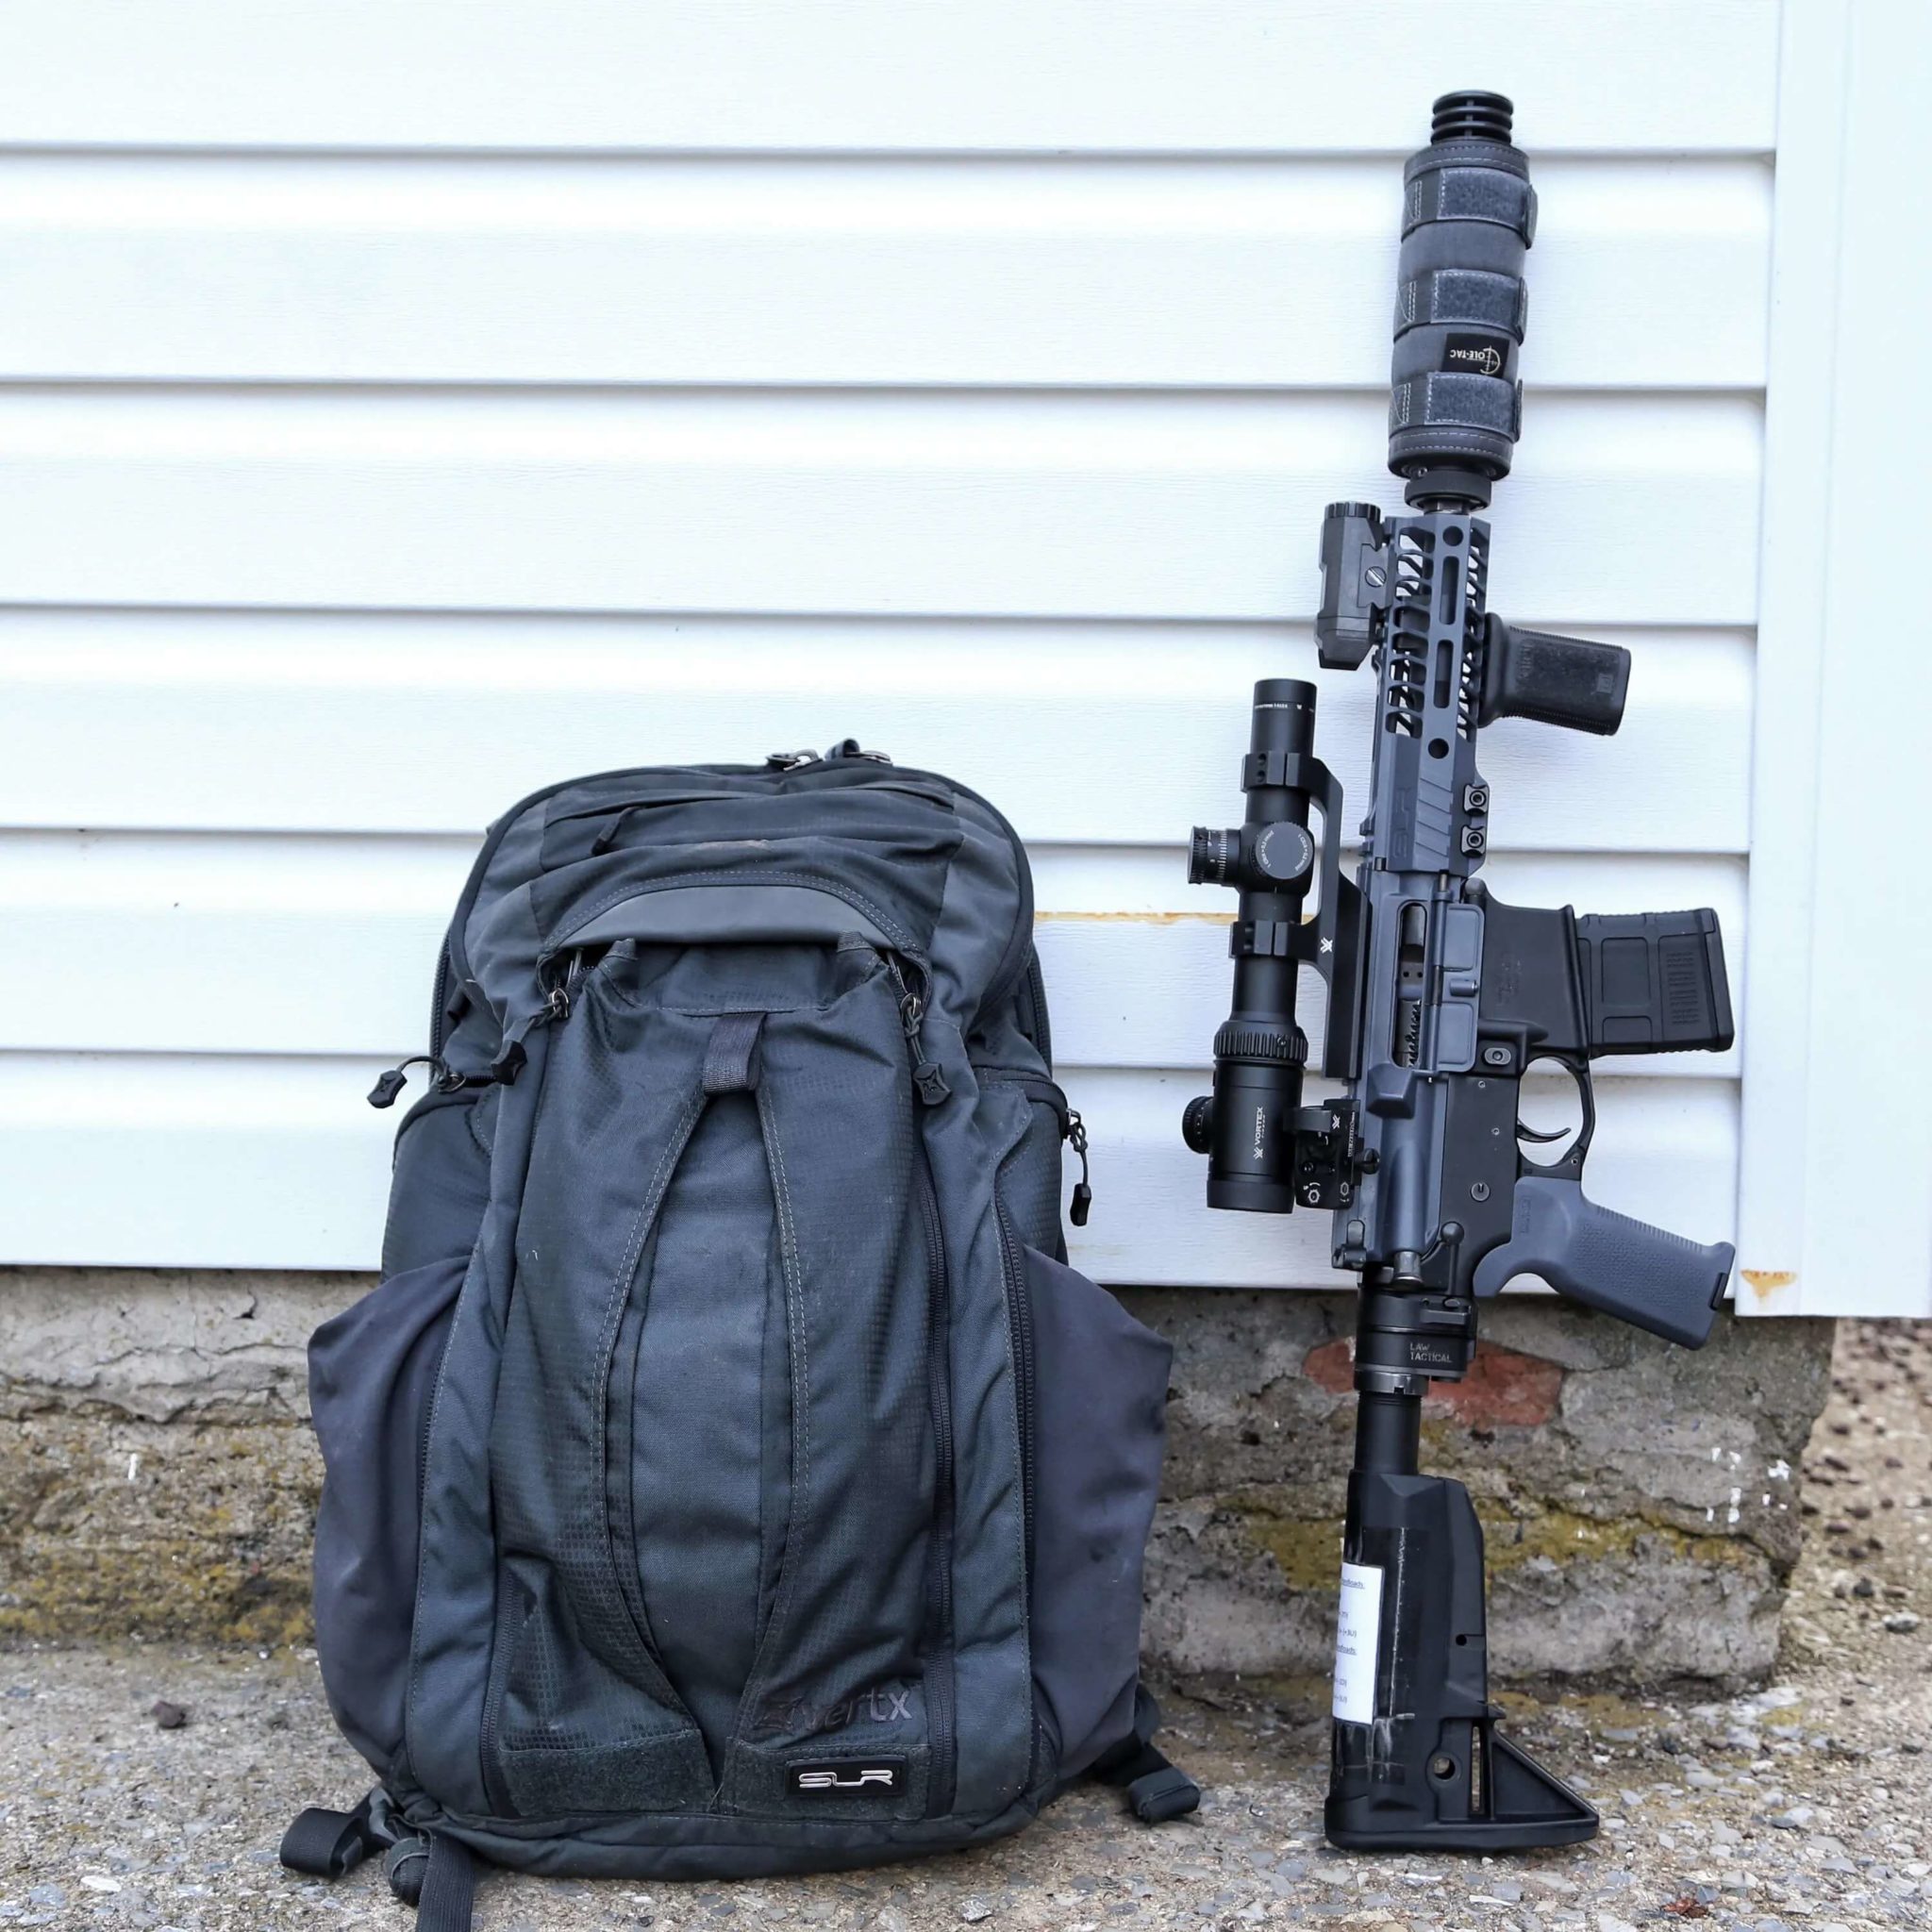
The 6.7″ Helix Rail has QD sling mounts on four locations so mounting a sling is a seamless proposition. I like to run a two point Vickers Sling from Blue Force Gear on my rifle, and I keep the sling attached to the rear most QD mount location on this rail. Again, it is my personal preference, you may find different setups suit you better.
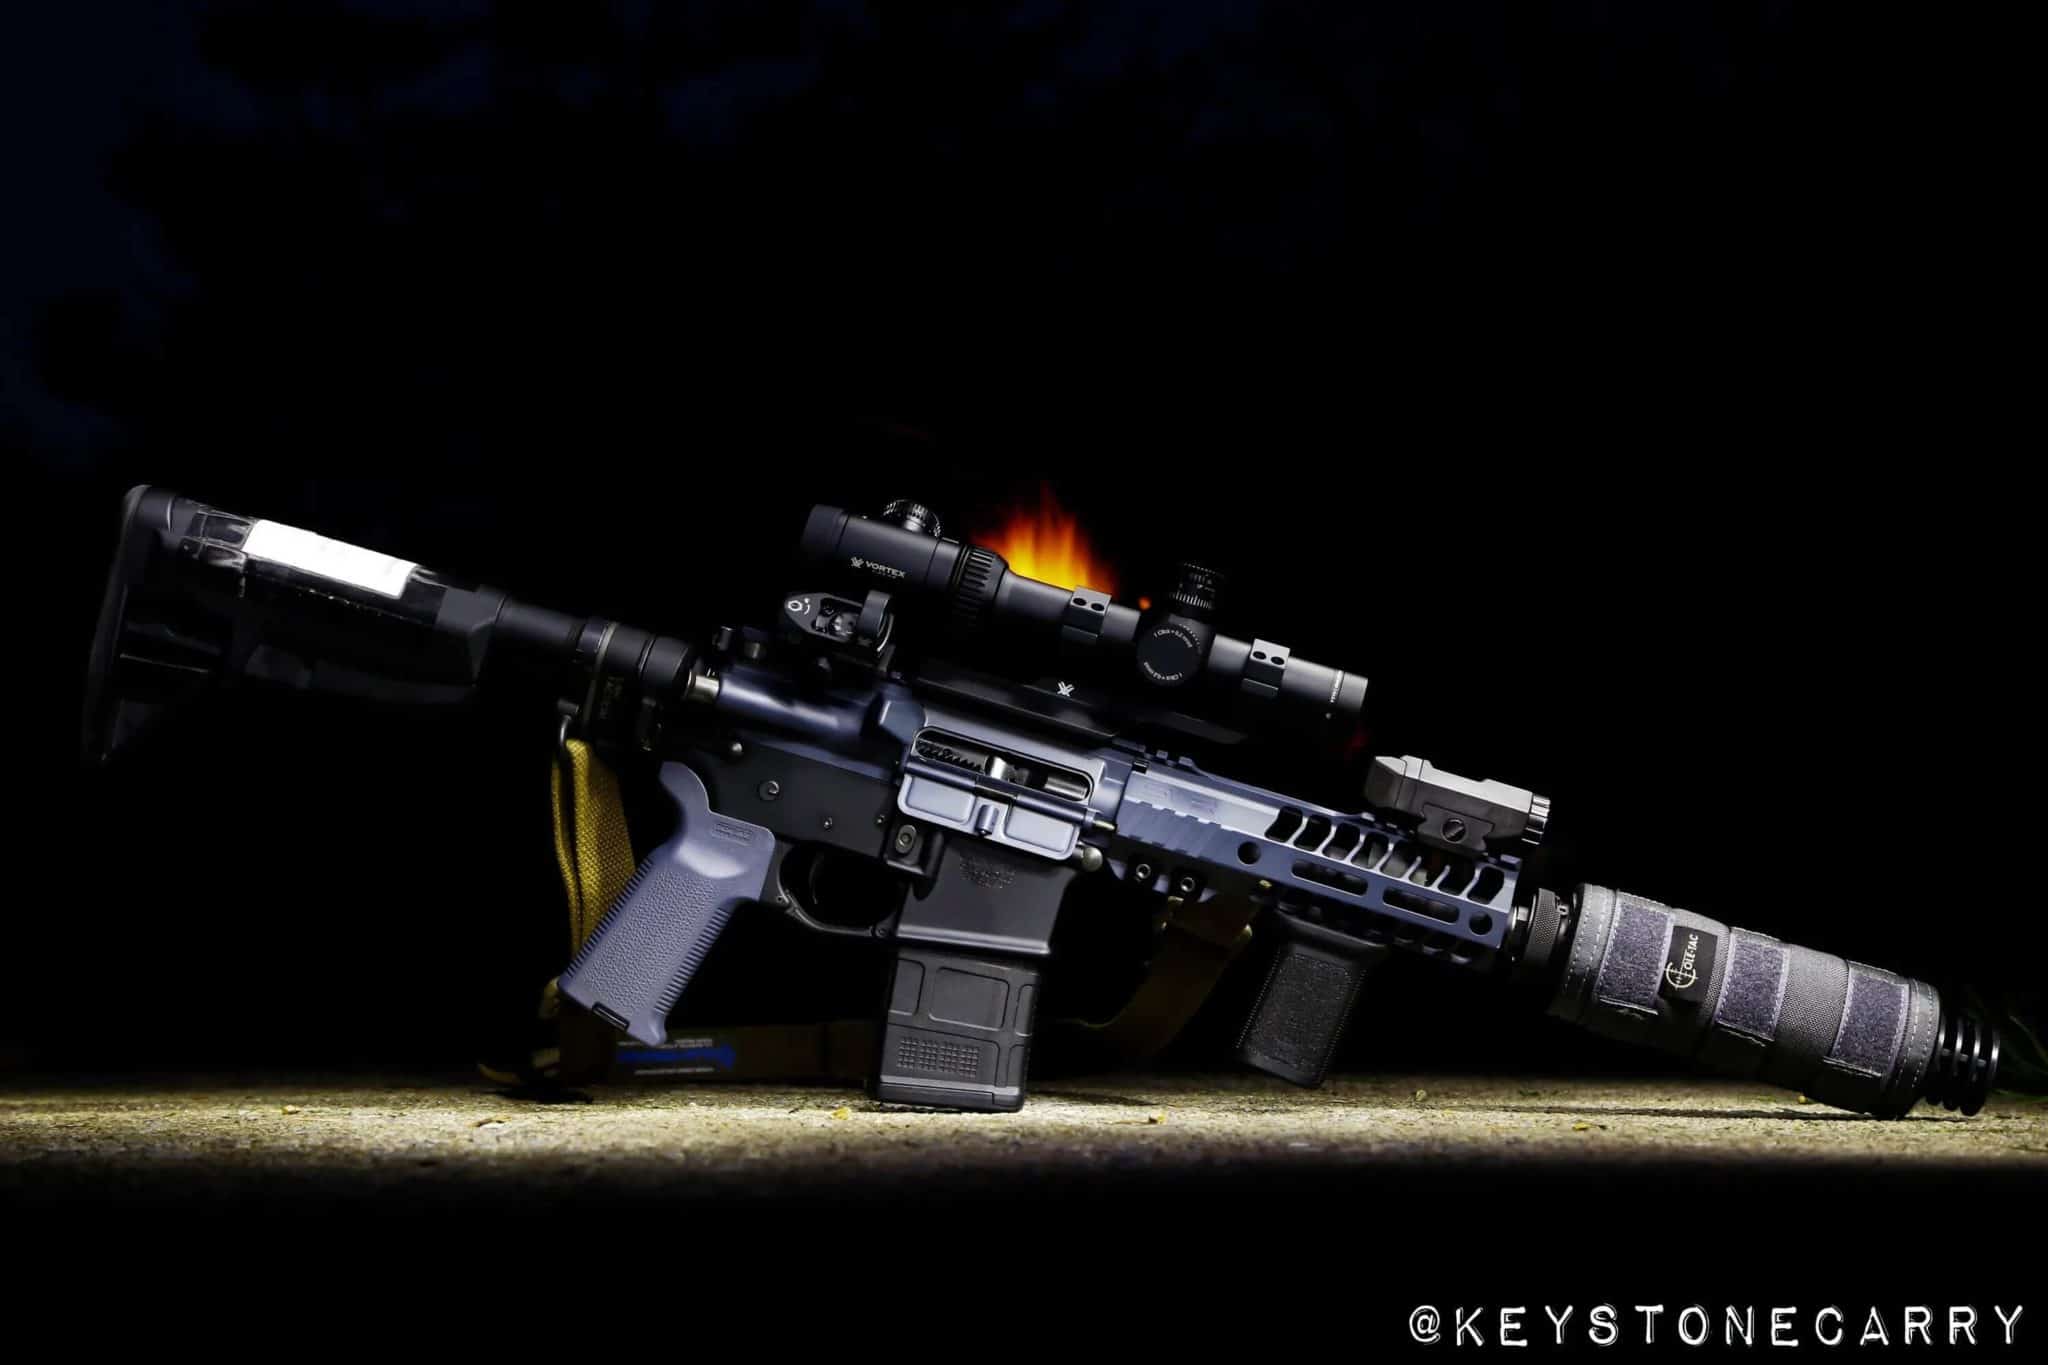
I opted to go with a BCM MOD 0 stock for this build. This was my first time purchasing one of these stocks, so I wasn’t sure how I felt about them. I definitely like it from a functional standpoint. It is not super light weight but it locks onto the buffer tube and has very little movement. Many of you remember from my previous blog that I was running a magpul MOE stock on the SBR lower and my biggest complaint about that stock is it is sloppy. While I was on BCM’s site I grabbed one of their small canted vertical foregrips. Again, I was unsure how I was going to feel about this piece, but after shooting it one time I immediately knew it was what I needed. There is not much room on this rifle to pull the gun back into my shoulder and the verticle grip allows me to further control this little beast and keep the muzzle on target. I definitely recommend this piece for your build, just keep in mind that pistols under 26″ cannot run a verticle foregrip. I am not a lawyer, nor would I recommend legal advice to you, but if it is over 26″ in length I wouldn’t be worried personally about running a vert grip on a pistol build. Again, that is for me personally, ultimately you have to make your own call and read into the laws and determinations the ATF likes to put out from time to time.
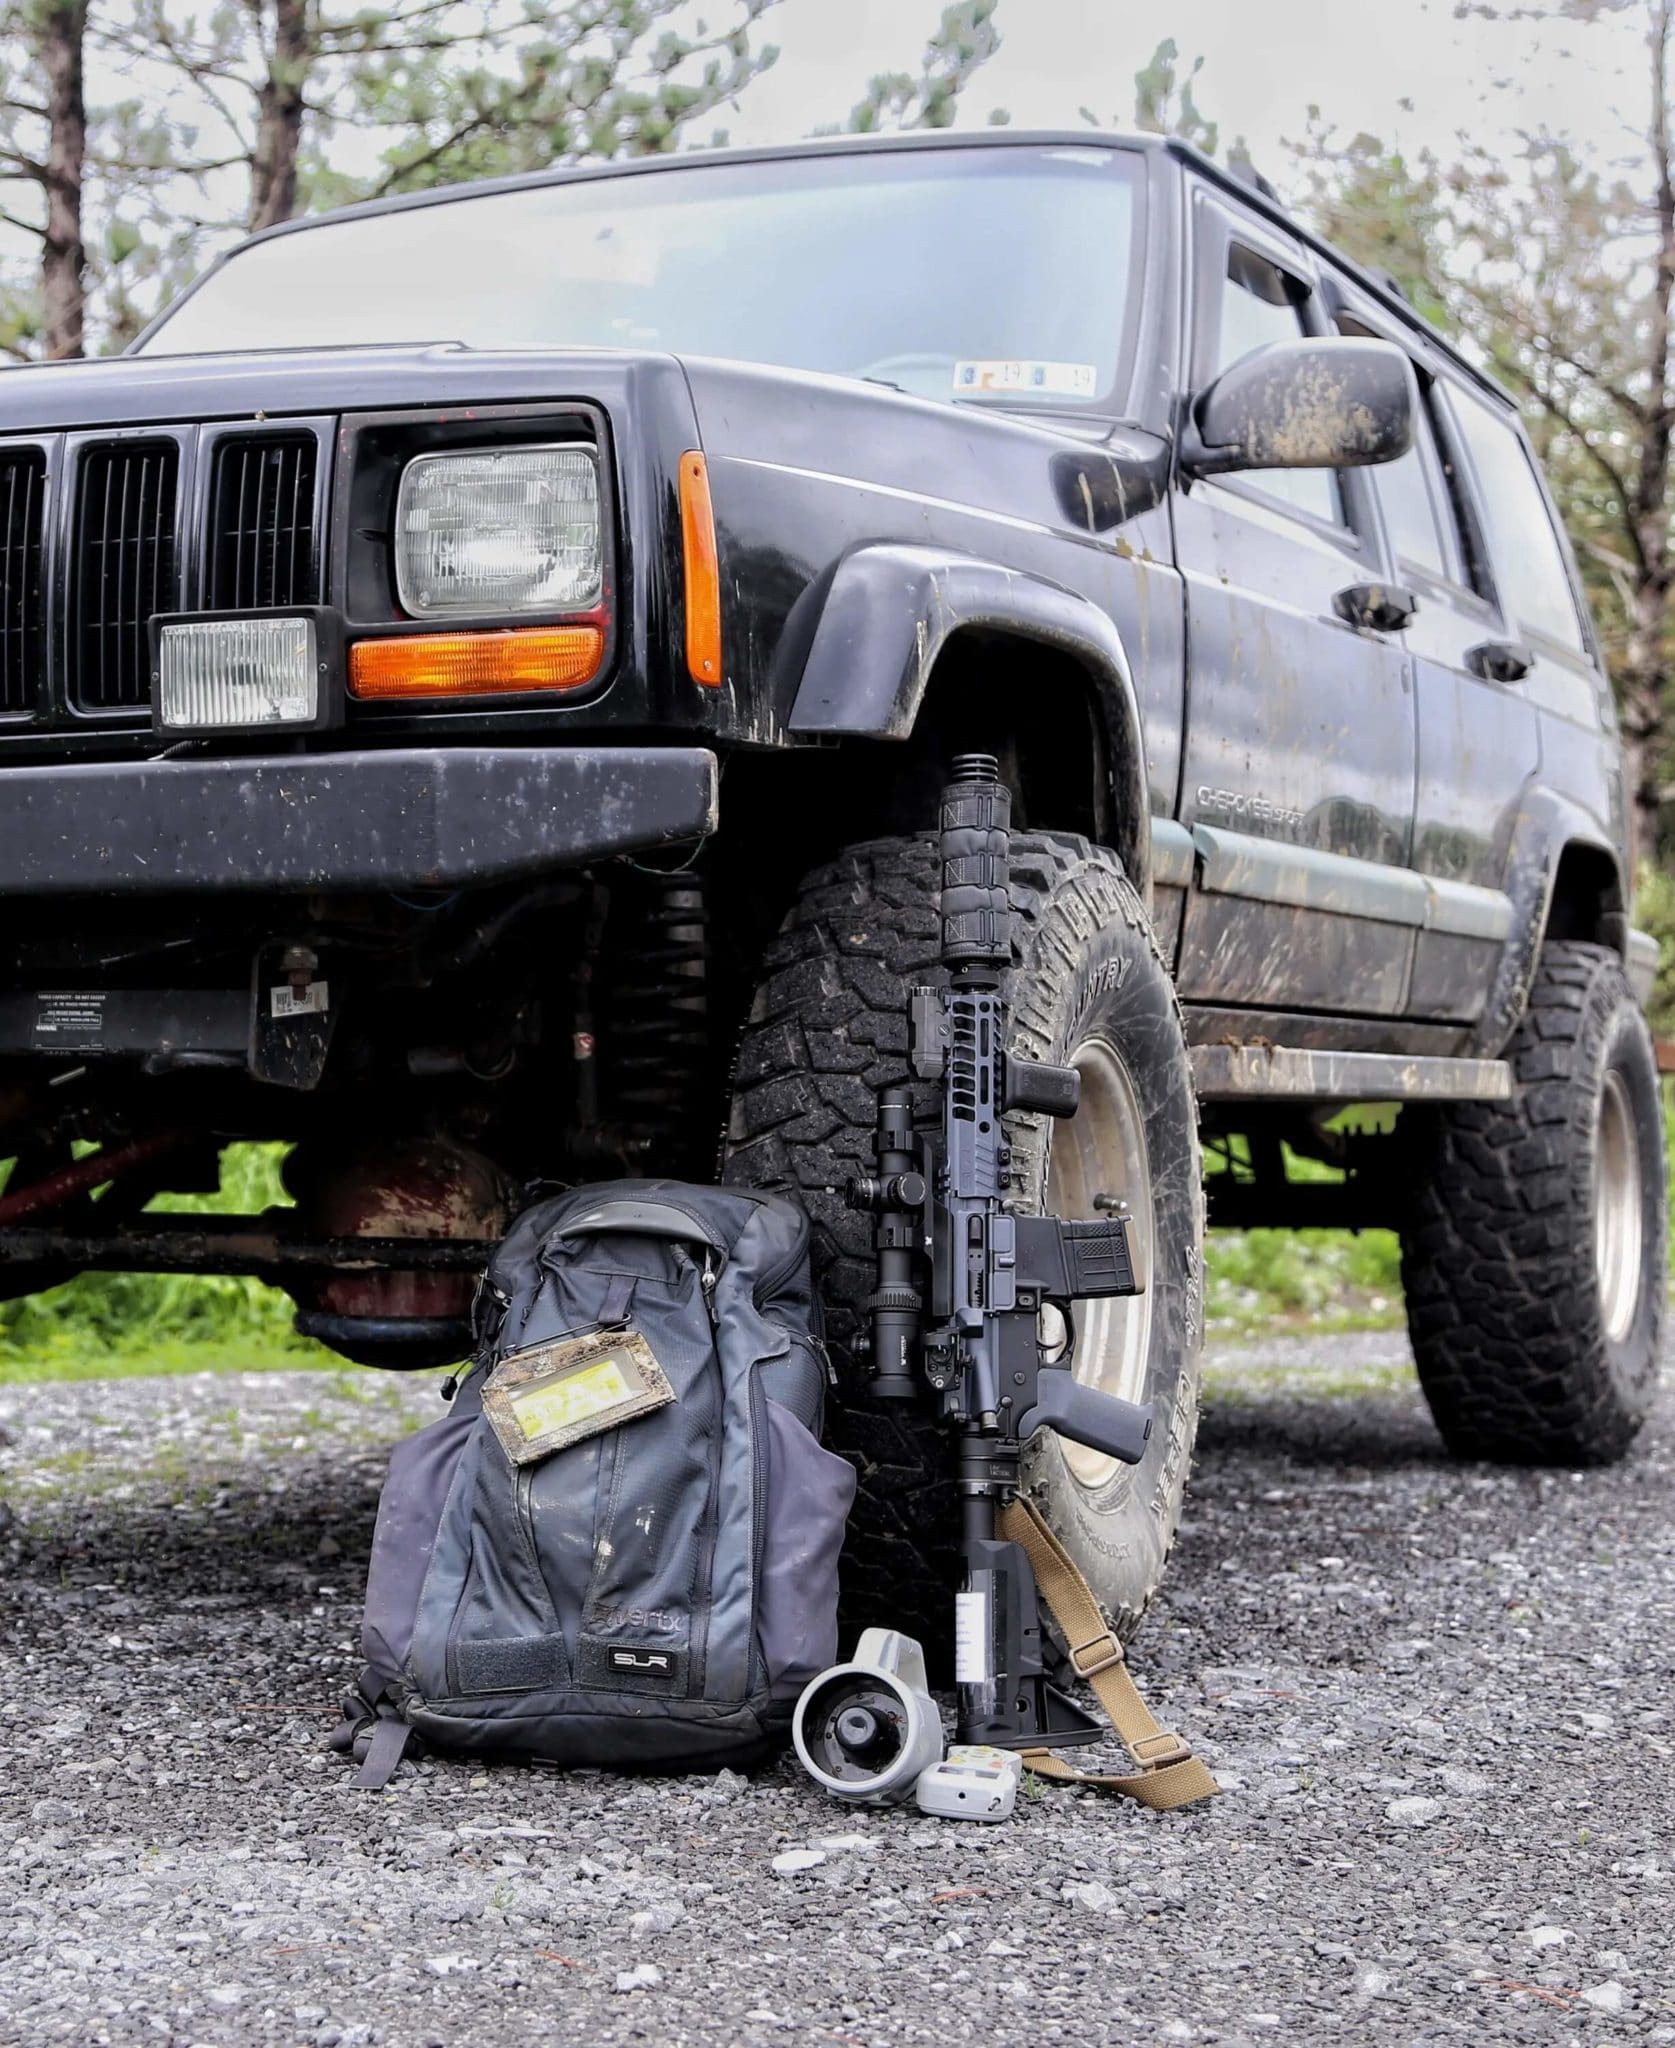
As I stated in my prior blog post and earlier in this one, one of the main reasons I built this rifle was for hunting. I love predator hunting and the 300 blackout is a potent caliber for all things small and furry. When I am in northern pennsylvania I often go on hikes with the blackout and my foxpro and run sets for coyotes or foxes. The compact size of this rifle allows me to carry it in my backpack covertly, and be easily deployed in seconds. I usually carry it in my Vertx Gamut back (shown above) and I carry a Gen 4 Glock 19 on my waist concealed. Aside from hunting this is my go to rifle for home and property defense. Danger is very real whether it be a rabid dog or animal, or a human attacker. I want all advantages possible when it comes to protection.
As far as the barrel, BCG, bolt, and other hardware pieces, those remained unchanged. The barrel is a 1:7 twist 7.5″ standard barrel from Anderson Manufacturing. The BCG is also from Anderson Manufacturing. I am still running a standard buffer and spring, although occassionally I have run a David Tubb flatwire spring. I bought that a long time ago to see if it changed anything, and I do notice that it seems lighter weight than a standard spring, but my blackout runs anything with either spring in the buffer tube. I have helped a few people build this exact rifle (or very similar) from the same parts and they have reported the same. Like it or not, anderson had their stuff together with this barrel/gas block combo and it runs everything. Supersonic suppressed or unsurpressed? You bet. Subsonic suppressed or unsuppressed? Does that too. It doesn’t care what I throw at it, it runs everything reliably. Many people believe that 300 blackout builds are notoriously difficult to dial in, but I am going to argue that the people who are having issues are running a piston setup, or extremely low quality parts, or parts that didn’t go through a legitimate quality control process. We have many 300 blackout builds, all pistol length gas systems, all cycling perfectly fine among our team. Ignore the noise of the nay-sayers and build a quality rifle. It should run perfectly fine.
As far as accuracy goes, this rifle groups at 2-2.5″… at 200 yards! I have it zeroed at 25 yards and I have a dope chart taped to my stock with my elevation and windage adjustments to retain my zero out to 200 yards. I don’t ever plan on shooting further than 200 yards, but with this scope and rifle combo I would confidently shoot at a coyote at 150-200 yards if need be. Some people will call BS on the accuracy, but I couldn’t care less. I keep the paper targets that I shot for record, if you really don’t believe me I will email a pdf copy. If I do that though, you owe me lunch for my time!
Overall this has quickly become my favorite rifle in my inventory. It is the one I would grab no matter what, even over my 223 or 308 in most situations. It is a very soft shooting, accurate and dependable rifle. Over the last two years I have invested a lot into this, but I did it over a couple years slowly. The point is this: don’t skimp out on the details and build the cheapest rifle just to save money. Build on a budget, but build with quality parts that will serve you well. “Buy once, Cry once”, you know?
I tried to summarize the costs associated with this build in the previous blog, but I am not going to focus on that here. The fact is, it was expensive and added up over time, but as I have replaced items and swapped them out, I have added them onto other firearms and used them in other areas. I hope that this blog answers some of your questions and helps you determine a roadmap for your next build. Just keep in mind that there are many ways to achieve your requirements, and there is no one “right” answer. Always be cautious of the intentions of keyboard warriors who put out mis-information just to simply hear themselves speak. There are many myths surrounding the viability and reliability of the 300 blackout cartridge, and after 2 years it has quickly become one of my favorites. Thank you for taking the time to read this, enjoy the journey!
I have had a lot of people ask for a complete list of parts currently on this rifle, so here it is:
-Anderson Upper
-Anderson Black Nitride BCG
-Anderson standard charging handle
-Anderson Lower Receiver
-Standard buffer and spring, sometimes I run a david tubb flatwire spring
-Standard milspec buffer tube
-7.5″ 1:7 barrel chambered in 300 blackout
– I run either a Geisselle SSA-E or Velocity Flat 3lb trigger
– SLR Rifleworks 6.7″ Helix MLOK Rail
-Standard Non-adjustable gas block, pistol length gas system
– ASR Brake
-Inforce APL or WML lights (depending on what I am doing)
-Vortex Viper PST 1-4 (gen 1)
-Vortex Venom 3 MOA dot
-Vortex offset mount
-Law tactical Folding adapter
-BCM mod 0 stock
-BCM canted foregrip
-Coletac suppressor wrap
-Blue Force Gear sling
About the Author
Jared is the VP of Design & Marketing for tatargets. His role centers around content creation, marketing, photography, videography, prototype design, and serving our customers needs on a daily basis. You can find Jared on his personal Instagram page: @keystonecarry.